
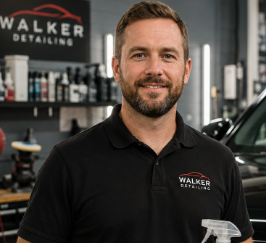
By James Walker
Quick Answer: To accessorize a car interior, start with a clean cabin, then add useful pieces first: custom-fit mats, a seat-back organizer, and a light seat cover. Finish with style touches like a steering wheel cover or soft lighting. Keep airbags, pedals, and sightlines clear.
Picture a Saturday. The coffee is hot, the garage door is up, and your daily-driver sedan finally gets your full attention. By lunchtime it can feel like a different car. Learning how to accessorize a car interior is not about buying everything in the checkout aisle. It is about choosing a few smart pieces, placing them safely, and letting the cabin match your taste. Let’s walk through it hour by hour.
Good to know: This article is for general educational and planning guidance. It does not promise specific results and works alongside advice from qualified professionals. Some tasks, such as deep odor or mold treatment, upholstery repair, and anything near airbags or wiring, are best handled by a trained professional. Please check your vehicle’s owner’s manual and the product label, and test on a small hidden area first.
8:00 a.m. — Decide What “Accessorize” Means for Your Car
Interior accessories fall into three jobs. Some protect surfaces, like mats and seat covers. Some organize your space, like seat-back pockets and console trays. Some simply add style, like steering wheel covers or soft cabin lighting.
Why does this matter? A tidy, well-protected cabin is more comfortable on long drives, easier to keep clean, and often looks better when it is time to sell. Many owners find that protection and organization pay off before decoration does.
Myth vs. reality: Many people think accessories are only cosmetic. In practice, the best ones reduce daily wear, such as grit in the carpet or crumbs in seat seams, while making the car feel more personal.
A good rule: pick one item from each job. That keeps the look balanced and the budget calm.
Accessory Types Compared
Takeaway: Start with whichever job solves your biggest daily annoyance, then add style last.
9:00 a.m. — Clean First, Accessorize Second
When cleaning a family SUV after a road trip, I always find the same thing: crumbs under the seat rails and a gritty film on the door panels. Putting a new cover or mat over dirt traps it, and grit can rub against the surface underneath. A quick reset gives your accessories a clean start.
The idea is simple: vacuum, wipe, dry, then install. This is what “ready for accessories” looks like.
Here is the flow most weekend detailers follow before adding anything new.
Prep Flow: Empty → Vacuum → Wipe → Dry → Install
Remove clutter and old mats
Seams, rails, and carpet
Panels and seats with a damp microfiber
Let surfaces fully air out
Add accessories one at a time
Read it left to right. Most of the work sits in steps two and three, and the drying step is the one people skip. Moisture trapped under a cover or liner may lead to musty smells, so give everything time.
Note: Perforated or heated seats need extra care. Use a barely damp cloth rather than a wet one, and avoid soaking seat areas where sensors or wiring may sit.
10:00 a.m. — Safety Rules Before You Buy
Safety belongs in the plan from the start. Several common accessories can interfere with parts of the car that matter most in a crash or in everyday driving.
- Airbags: Seat-side airbags deploy from the seat. Covers that are not labeled airbag-compatible may interfere. Check your owner’s manual, and see NHTSA’s air bag information.
- Pedals: Floor mats should lock into the factory retention hooks and never stack on top of one another. A mat that slides under the pedals is a real hazard.
- Child seats: Thick seat covers or padding under a child seat can affect fit. Follow the child seat manual and NHTSA’s car seat guidance.
- Sightlines: Dangling charms on the mirror and bulky dash items can block your view.
Safety Note: Never place loose objects where they could roll under the pedals or become projectiles in a hard stop. Keep the airbag panels on the dash, steering wheel hub, and seat sides clear of decorations and stickers. If any accessory needs wiring, such as lights or cameras, ask a qualified installer.
Not sure which accessory suits your situation? This decision path can help you choose.
Safe-Use Decision Path
If any answer is “I’m not sure,” pause and check the manual. A five-minute check can save you a return, or a safety concern.
11:00 a.m. — Step-by-Step: How to Accessorize a Car Interior
Now the fun part. Work in this order, since each step makes the next easier.
Tip: Install one accessory at a time and drive a few days before adding the next. That makes it easy to spot a rattle, a slippery cover, or a strap that rubs.
12:00 p.m. — Match Accessories to Your Materials
Different surfaces like different treatment. Leather may scuff under rough fabric, cloth can hold moisture, and glossy plastic shows adhesive marks. Pick accessories that suit what you already have.
Which Accessory Suits Which Driver
Here is a quick look at which materials work best with each accessory.
Material Fit Dashboard
Smooth, breathable covers; avoid sticky adhesives.
Wipeable covers; watch for trapped heat in summer.
Grippy, washable covers; dry fully before fitting.
Use soft mounts, not strong adhesive tape.
Use this as a quick filter. If a product’s label does not mention your material, ask the seller or choose another option.
1:00 p.m. — Pick a Style That Feels Like You
Once the practical pieces are in, you can shape the look. A cohesive palette tends to look more expensive than a mix of random items. Try one of these directions.
Use cream or tan accents with burgundy touches. Pair a stitched wheel cover with matching mats for a warm, tailored feel.
Stick to black or grey and keep surfaces clear. A single organizer and quality mats are often enough for a calm, modern look.
Choose a bold accent color on mats and stitching. Keep it to one or two spots so it feels intentional, not busy.
Pick darker, wipeable fabrics with bright, kid-friendly organizers. Function leads, and style follows.
Takeaway: Pick one theme and stick with it. Three matching items beat ten that clash.
2:00 p.m. — Fix Problems Before They Annoy You
Even good accessories can misbehave. Here are the usual suspects and what typically causes them.
Common Issue vs. Likely Cause
Heads-Up: Strong adhesive pads and suction cups can leave marks on soft-touch plastic and some dashboards, especially after a hot summer. Test in a hidden spot, and prefer clip-on or friction-fit designs.
Smart Choices vs. Weaker Choices
3:00 p.m. — Mistakes to Avoid and Better Choices
Most regrets come from a handful of habits. Here is how to sidestep them when you work out how to accessorize a car interior on a budget.
Common Mistake vs. Better Choice
Not every upgrade is equally worth your time. This chart shows a general guide to where most owners put their effort first.
Typical Priority (practical guide, not a measurement)
Your own list may look different. A dog owner may move seat protection to the top, while a commuter may favor organization. Use the chart as a starting point, not a rule.
4:00 p.m. — Pro Tips and a Final Walk-Around
Experienced detailers notice small things a beginner might miss: a mat edge riding up near the pedal, a strap pressing into soft leather, or a cover that hides a seat-side airbag label. They also check that every accessory comes off easily for cleaning. If you can’t remove it in under a minute, you may skip cleaning it.
Here is a pre-finish checklist to run through before you close the doors.
Final Walk-Around Checklist
If you tick every box, the car is ready. If one fails, fix it before the first drive. A final pass is also a good moment to remember that how to accessorize a car interior well comes down to restraint: fewer, better pieces.
When to contact a professional: Call an upholstery specialist or qualified technician for seat repairs, covers on seats with side airbags you are unsure about, or any lighting or camera that needs wiring. See a professional detailer if you find lingering odor or signs of mold under mats or covers.
Gear Worth a Look
If you want somewhere to start, these two categories tend to give the biggest everyday payoff. Always confirm fit for your exact vehicle and read the product label.
This article may contain affiliate links. If you buy through these links, we may earn a small commission at no extra cost to you. We only mention products that are relevant to the topic and they work alongside advice from qualified professionals.
Custom-Fit All-Weather Floor Liners
May help contain mud, water, and spills so your original carpet stays easier to keep clean. Check that the listing names your exact make, model, and year, and that the liners lock into your retention hooks.
Back Seat Organizer
Can help keep snacks, tablets, and wipes within reach and off the floor. Look for sturdy straps, soft-sided pockets, and a size that suits your seat back. Check the label for any weight limits.
For indoor air and cleaning-product tips that apply to a closed cabin, see the EPA’s indoor air quality resources.
Frequently Asked Questions
What is the best way to accessorize a car interior on a budget?
Start with floor mats and one organizer, since they protect and tidy the cabin at the same time. Add a steering wheel cover or a small tray later. Buy one item at a time so you can see what you actually use.
Are seat covers safe with side airbags?
Only if the cover is made for it. Look for covers labeled airbag-compatible for your seat type, and check your owner’s manual. If you are unsure, ask a qualified upholstery specialist.
Can I use floor mats over the factory ones?
It is safer to remove the old mat first. Stacking mats can slide into the pedal area. Use a single mat that locks into the retention hooks.
Will adhesive mounts damage my dashboard?
They can leave marks, especially on soft-touch plastic after heat exposure. Vent clips and cup-holder mounts are gentler. Test any adhesive on a small hidden area first.
How do I keep a minivan with kids tidy after I accessorize?
Use seat-back organizers, wipeable liners, and a small trash bag within reach. Give each item a home, and do a two-minute reset at the end of each week.
When should I hire a professional?
Hire one for upholstery repair, airbag-adjacent seat work, wiring for lights or cameras, and lingering odors or mold. A pro can also help if you are unsure what your seats are made of.
Final Thoughts
A great interior is built one thoughtful piece at a time. Clean first, protect the high-wear spots, organize what you carry, and let a few style touches tie it together. By the end of one Saturday, your car can feel more comfortable and look more like yours.
Keep safety in front: check your owner’s manual, read each product label, and test on a small hidden area first. For airbag-adjacent seat work, wiring, upholstery repair, or stubborn odors, a qualified professional is the right call. Enjoy the drive.
