
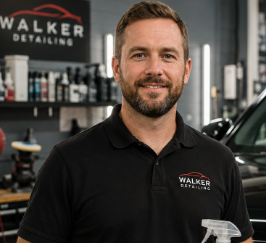
By James Walker
Quick Answer: To clean cloth car upholstery, vacuum thoroughly, test a mild upholstery cleaner on a hidden spot, scrub gently in small sections, blot with a damp microfiber towel, and let the seats dry fully with the windows open. Work in light passes so the fabric never gets soaked.
Picture a free Saturday, a cup of coffee, and a car whose seats have seen better days. Crumbs sit in the seams, and there is a faint ring where a latte once tipped over. By dinner, those seats can look and smell noticeably fresher. This guide follows one easy Saturday timeline, from the first vacuum pass to the final protective step, so you always know what to do next and what to skip.
Cloth seats Stain removal Safe drying DIY detailing
Please read: This article is for general educational and planning guidance. It does not promise specific results and works alongside advice from qualified professionals. Some tasks, such as deep odor or mold treatment, upholstery repair, and anything near airbags or wiring, are best handled by a trained professional. Please check your vehicle’s owner’s manual and the product label, and test on a small hidden area first.
8:00 AM: Know What You Are Cleaning
Cloth seats are usually woven or knitted polyester, nylon, or a blend. Fabric holds onto dust, sweat, and spills more than leather or vinyl does, because liquids soak into the fibers instead of sitting on top. That is why a spill can become a stubborn ring and why damp seats can start to smell if they stay wet.
Clean seats matter for more than looks. They feel better against your back, they help the cabin smell fresher, and a tidy interior is often easier to sell or trade in. Start by checking your owner’s manual for any upholstery care notes. Then look at the seat for stitched-in tags, built-in seat heaters, and side-airbag markings. If a seat has a side-airbag label, keep liquid away from that seam and never soak it.
Cleaner Types for Cloth Seats Compared
Takeaway: For most owners, a labeled upholstery cleaner plus a handheld extractor covers nearly every job. Keep enzyme cleaner on hand for pet and food spills.
Your Pre-Clean Checks
A two-minute look before you start prevents most mistakes. Run through these checks first.
Pre-Clean Dashboard
Look for upholstery or airbag notes.
Woven cloth, microfiber, or suede-like.
Keep liquid away from labeled seams.
A breezy, shaded spot dries best.
Under the seat or the lower back edge.
Clean beneath them while they are out.
Think of this as a pilot’s checklist. If any box stays empty, pause and fill it. A seat with a labeled side airbag, for example, deserves extra-light moisture along that seam. Many owners find that spending the first few minutes here saves them an hour of fixing mistakes later.
9:00 AM: Vacuum Like You Mean It
Dry soil is the real enemy. If you add water to a seat full of grit, you create mud inside the weave. A thorough vacuum first means your cleaner spends its effort on stains, not on sand. When cleaning a family SUV after a road trip, I often find crumbs deep in the seat bottoms, where the cushion meets the backrest.
Crevice tool
This narrow nozzle reaches seat seams, rails, and the gap beside the console. Slide it slowly so the airflow can lift crumbs out.
Soft detailing brush
Brush fabric in short strokes while you vacuum. This loosens trapped dust and lifts flattened fibers without scratching nearby plastic.
Rubber upholstery brush
A rubber-bristle tool can gather pet hair into clumps you can vacuum up. It suits dog owners and works best on dry fabric.
Clean microfiber towels
Microfiber (a fine-thread cloth that grabs dirt) is ideal for blotting. Keep a few white or light towels so you can see what is lifting off.
Safety Note: Open the doors or work in a ventilated space when using any cleaner. Keep water and sprays away from seat-mounted switches, heater controls, occupant sensors, and labeled airbag seams. If a seat has an electrical connector underneath, leave it alone and let a technician handle it.
10:00 AM: The Step-by-Step Cleaning Session
Now comes the main event. Here is how to clean cloth car upholstery without soaking it, one seat section at a time.
Here is the flow at a glance, from vacuum to finish.
Cloth Seat Cleaning Flow
Remove dry soil
Hidden spot
Light cleaner
Soft brush
Lift dirt out
Airflow, patience
Use this as a mental map. If a step feels rushed, such as skipping the rinse, expect a stiff or dingy patch that returns sooner than the rest of the seat.
Choosing a Safe Method for Your Seat
Different fabrics need different care. Use this path to pick a method before you pick a product.
Safe-Use Decision Path
Choose the lightest method that works. If the fabric looks like suede, brush softly with a dry or barely damp towel, and ask a detailer before using heavy moisture.
11:30 AM: Tackling Stains and Odors
A common myth says harsh chemicals are the only way to beat a stain. In reality, patient blotting, the right cleaner, and a second pass tend to beat one aggressive scrub. A rideshare driver might see a spilled soda one day and a muddy shoe print the next. The method stays the same: blot first, treat gently, repeat if needed.
Common Seat Problems and Likely Causes
Takeaway: Most problems come from too much liquid or leftover cleaner, and both are easy to prevent with light passes and a rinse.
Tip: Work on fresh spills right away. Blot with a dry towel, then treat. Many owners find fresh spills lift far more easily than ones that have dried overnight.
Best Habits vs. Less Effective Habits
For odors, find the source first. A faint smell often traces to a spill that soaked through to the foam, or to damp floor carpet below the seat. If the smell returns after cleaning and thorough drying, a hidden moisture source may be the cause.
Heads-Up: Do not mix cleaning products. Some combinations can release harmful fumes. Use one product at a time, follow its label, and rinse before trying another.
1:00 PM: Dry It Right
Drying is where good cleaning jobs succeed or fail. Park in a shaded, breezy spot, open all the doors, and let air move through the cabin. On a humid day, running the vehicle’s climate control with fresh-air mode can help, and a clean fan pointed at the seat can speed things up. Skip the heat gun and skip hair dryers held close, since concentrated heat may stress the fabric and nearby trim.
Press a dry towel into a thick area, like the seat bottom. If the towel picks up moisture, give it more time. Wait until the seats feel dry to the touch before closing up the car, because trapped dampness is a common reason seats smell musty days later.
Here is a rough sense of how much effort each stage takes on a typical Saturday.
Relative Effort by Stage (practical guide)
Drying needs less effort but more patience. Plan your afternoon around it, and use the wait time to wipe hard surfaces or run a vacuum over the floor mats.
3:00 PM: Protect and Maintain
Once the seats are fully dry, a fabric protectant (a spray that helps liquids bead up instead of soaking in) can make future spills easier to blot. Check the label to confirm it is meant for automotive or upholstery fabric, test a hidden spot, and apply in light, even coats with plenty of ventilation. Let it cure as directed before anyone sits down.
Match the Routine to Your Life
Daily commuter
A quick vacuum every couple of weeks keeps dust from grinding into the weave. Deep clean a few times a year.
Parent with a minivan
Child seats trap crumbs and spills underneath. Remove them, vacuum the seat, and keep a small blotting kit in the glove box.
Dog owner with a crossover
Washable seat covers or a hammock cover catch most hair and muddy paws. Use a rubber brush weekly.
Rideshare driver
High traffic means more frequent light cleaning. Spot-treat between rides and do a full cleaning session often.
Product Fit at a Glance
Here is how common materials compare for cleaning difficulty and drying time.
Material Fit Dashboard
Most forgiving. Light mist and blot work well.
Soft feel. Test first and brush gently to restore the nap.
Delicate. Use minimal moisture or ask a pro.
Keep seats dry and avoid soaking switches and wiring.
Use this as a quick filter. If your seats land in the delicate column, move slowly, use less liquid, and rely on a trained detailer for anything beyond a light clean.
Common Mistakes and Better Choices
When to contact a professional: Call a detailer or upholstery specialist for deep odors that keep returning, suspected mold, burn marks, torn fabric, rare or vintage materials, and anything near airbags, seat wiring, or occupant sensors. A trained eye can save you from an expensive repair.
What Experienced Detailers Notice
Pros often start by smelling the seat and pressing into the cushion. A musty smell or a cool, damp feel can signal a hidden moisture problem. They also check seat tracks and under-seat carpet, which are common places for spills to hide. Learning to look underneath saves time, because a perfectly clean seat top can still hold odor from below. For general guidance on keeping indoor air fresh, the EPA’s indoor air quality resources are a helpful reference, and the American Cleaning Institute shares tips on using cleaning products safely. If you remove child seats during cleaning, review installation guidance from NHTSA before putting them back.
This article may contain affiliate links. If you buy through these links, we may earn a small commission at no extra cost to you. We only mention products that are relevant to the topic and they work alongside advice from qualified professionals.
Gear That Can Make the Job Easier
Automotive Upholstery Cleaner
A cleaner made for fabric seats can help make routine cleaning easier and lift everyday dirt. Check that the label lists fabric or upholstery, and test on a hidden spot first.
Handheld Spot Extractor
A small extractor may support deeper cleaning by pulling dirty water out of the fabric. Read the manual, use a light touch, and keep moisture away from seat electronics.
Frequently Asked Questions
What is the best way to clean cloth car upholstery at home?
Can I use dish soap on cloth car seats?
How long do cloth seats take to dry after cleaning?
Is it safe to use a steam cleaner on car seats?
How do I get rid of a musty smell in cloth seats?
How often should I deep clean cloth car seats?
When should I hire a professional detailer?
Final Thoughts
Fresh seats do not require special skills, just a plan and a little patience. Vacuum first, test before you treat, keep moisture light, and give your upholstery time to dry. Once you know how to clean cloth car upholstery in a single Saturday, regular touch-ups become quick and satisfying.
Check your owner’s manual and product labels, test on a small hidden spot, and lean on a qualified professional for deep odors, repairs, or anything near airbags and wiring. Your seats will thank you every time you climb in.
