Install the stereo, mount the camera, route the cable, wire power/ground, and test for safety.
I’ve installed dozens of head units and backup cameras over the last decade. This guide on how to install car stereo with backup camera will walk you step by step. I explain tools, wiring, mounting, testing, and common pitfalls in plain language. Read on to install confidently and avoid costly mistakes.

Tools and parts you need before starting
Gathering the right tools saves time and keeps the job safe. Here’s what I always have on hand when I show people how to install car stereo with backup camera.
- Screwdrivers: Phillips and flathead for trim and screws.
- Panel removal tools: plastic prying tools to avoid scratches.
- Wire strippers and crimpers: for clean connections.
- Multimeter: to test power, ground, and reverse trigger.
- Soldering iron or quality crimp connectors: for reliable splices.
- Electrical tape and heat shrink tubing: to protect connections.
- Zip ties and adhesive mounts: for neat cable routing.
- Wiring harness adapter: matches your car to the aftermarket head unit.
- Backup camera kit: camera, video cable or wireless transmitter, and power leads.
- New stereo (head unit): size and features that suit your needs.
Having everything ready makes how to install car stereo with backup camera faster and safer. I learned this after wasting time hunting for a single connector mid-install.
Preparation and safety steps
Start with safety. Disconnect the negative battery terminal. This prevents shorts and accidental airbag deployment. Read your vehicle’s manual for stereo and trim removal tips. Label screws and trim pieces as you remove them. Keep a small tray for fasteners.
Check the stereo and camera fit before you start wiring. Confirm the wiring harness adapter fits your car. Confirm the backup camera mount fits your bumper or license plate area. These checks avoid surprises in the middle of the job.
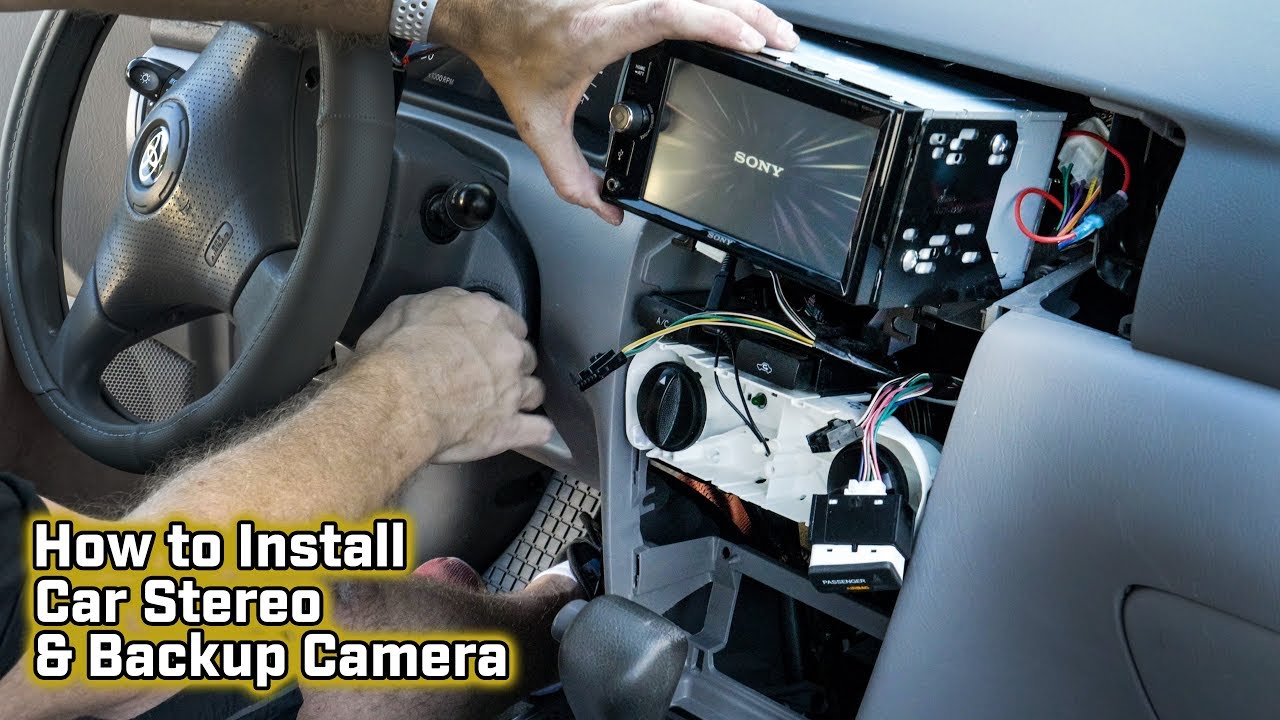
Step-by-step: how to install car stereo with backup camera
Follow these steps in order. Take your time and test as you go.
- Remove the old stereo
- Pry trim gently with panel tools.
- Remove screws holding the head unit.
- Pull the head unit out and disconnect wiring harness and antenna.
- Prepare the new stereo
- Attach the mounting sleeve or bracket per the instructions.
- Connect the wiring harness adapter to the head unit harness.
- Match wire colors and secure connections by crimping or soldering.
- Install the backup camera
- Choose mount location: above license plate, bumper cutout, or roof (SUVs).
- Secure the camera with supplied screws or adhesive.
- Seal around camera with silicone if mounting on the bumper.
- Route the camera cable
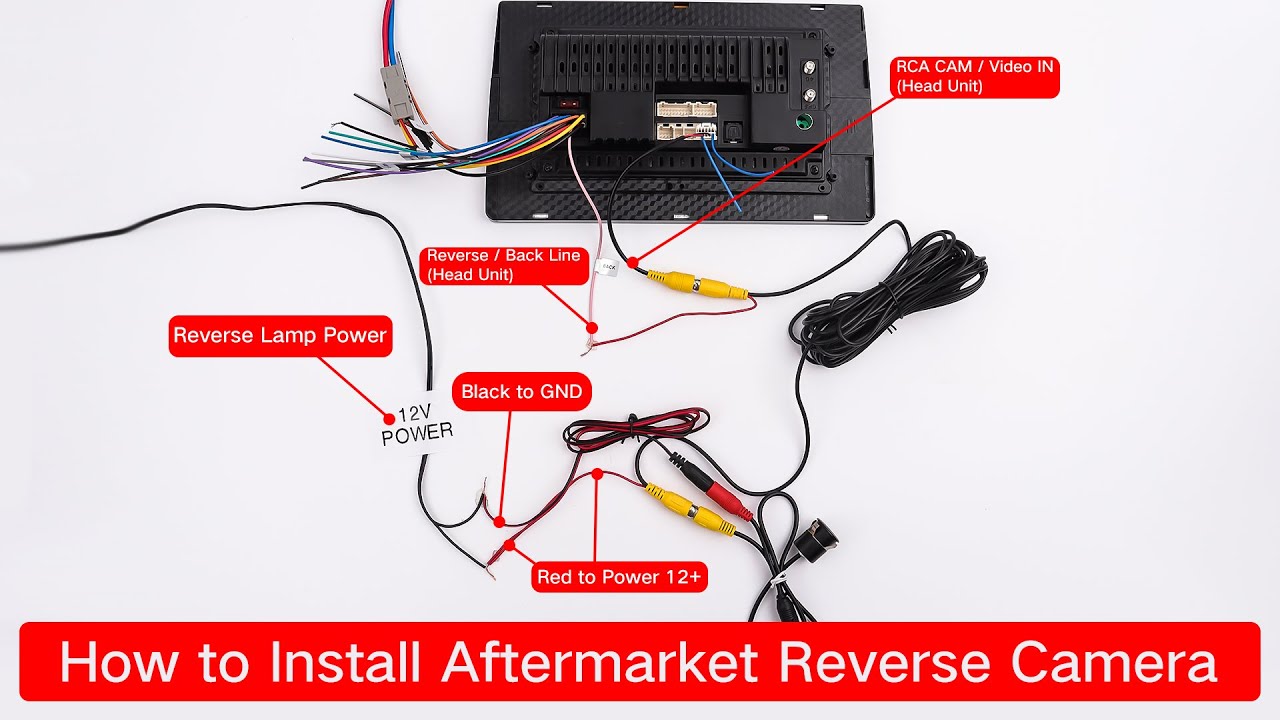
- Run RCA video cable or power wire from camera to the head unit.
- Use existing grommets or run through the trunk and under trim panels.
- Keep cable away from moving parts and hot exhaust components.
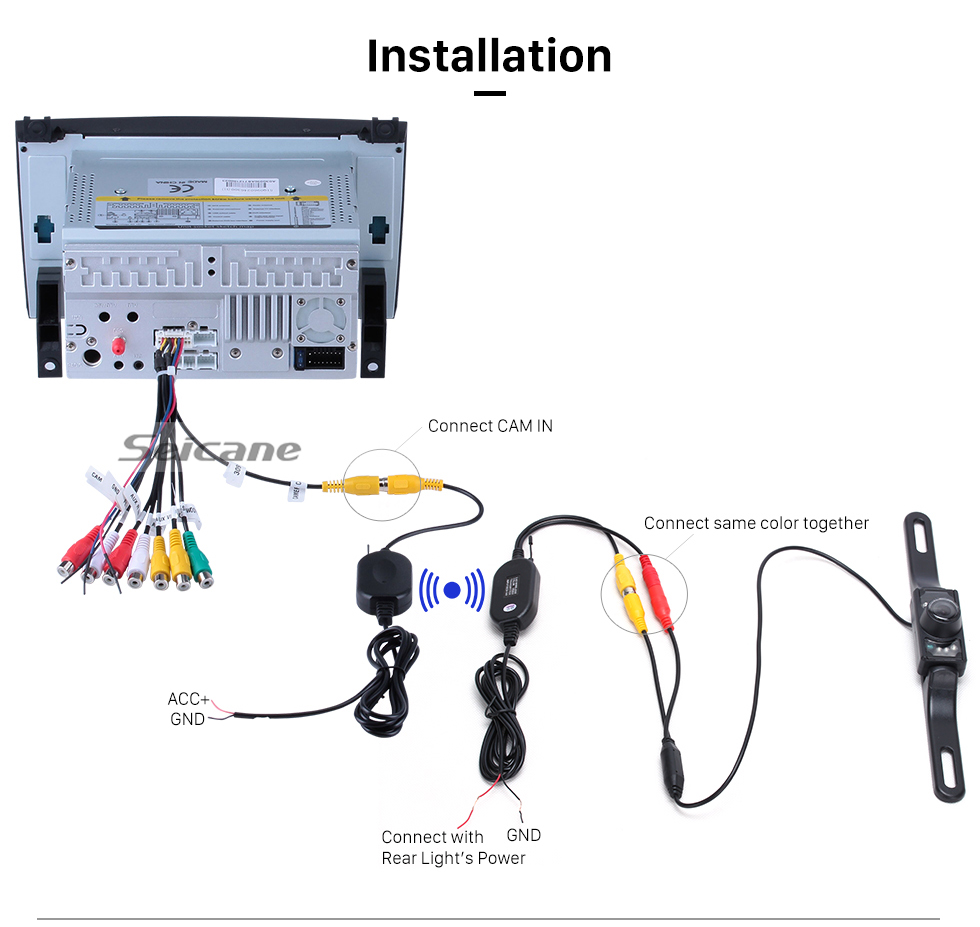
- Wire power and reverse trigger
- Connect camera power to the reverse light positive wire so the camera gets power only when backing up.
- Connect camera ground to chassis ground.
- Connect the head unit reverse trigger wire to the reverse light positive or to the camera’s trigger as needed.
- Final hookup and mounting
– Plug in the stereo harness adapter, antenna, and any USB or microphone cables.
- Slide the head unit into the dash and secure with screws.
- Reinstall trim and test all functions.
Testing early saves troubleshooting time when learning how to install car stereo with backup camera. If first test fails, re-check power and video connections.

Wiring details explained (simple terms)
Good wiring avoids flicker and audio noise. Here are the key wires and what they do.
- Constant 12V (yellow): keeps memory for clock and presets.
- Accessory 12V (red): powers the unit when ignition is on.
- Ground (black): chassis ground for both stereo and camera.
- Reverse trigger (often blue/white): tells the head unit to switch to camera view.
- RCA video cable: carries the camera video signal to the head unit.
- Camera power: taps into reverse light positive for power on reverse.
Use a multimeter to confirm wires before cutting. Testing prevents damage and wasted time.

Mounting the camera: placement and angle
Placement affects field of view and usefulness. Think about safety and visibility.
- License plate mount: easy and common. Offers level view on most cars.
- Bumper mount: can be low and give a wide view; may need sealant.
- High-mount on hatch or roof: good for trucks and SUVs for a wider area.
Angle the camera slightly down. You want to see the area immediately behind the bumper. Test parking slowly and adjust until the guide lines and view match your needs.
Common troubleshooting and fixes
If something goes wrong, check these fast.
- No video on screen
- Check RCA video cable for a loose connection.
- Confirm the head unit input is set to camera.
- No camera power
- Verify the camera power wire is spliced to the reverse light positive.
- Use a multimeter to test for 12V when the car is in reverse.
- Intermittent audio or video noise
- Ensure RCA cables are routed away from power wires and alternator cables.
- Replace cheap RCA cables if noise persists.
These steps are what I use first when helping friends with how to install car stereo with backup camera.
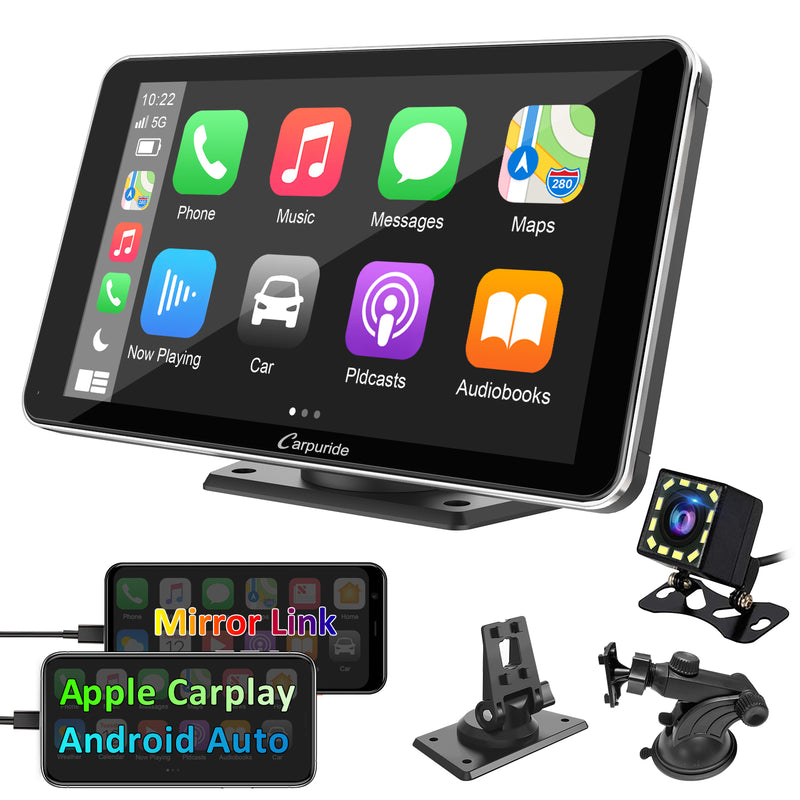
Choosing compatible stereo and camera
Choosing the right parts limits headaches. Match sizes and features.
- Single DIN vs double DIN: pick based on dash space.
- Camera resolution: higher resolution helps in tight spots.
- Night vision and wide dynamic range: improves low-light performance.
- Wired vs wireless camera: wired is more reliable; wireless is easier to install.
- Factory steering wheel controls: get an adapter to retain these features.
Compatibility ensures the camera and stereo work together when you install. I once fitted a double DIN into a car that needed a dash kit. Measure first.

Practical tips, mistakes to avoid, and personal notes
Here are lessons from the field that make installs smoother.
- Test everything before reassembling the dash. I learned this after reinstalling trim only to find a loose ground.
- Solder or use high-quality crimp connectors. Cheap crimps fail over time.
- Use a wiring harness adapter to avoid cutting factory wires.
- Protect cables with loom tubing where they pass through metal or tight areas.
- Label each wire during removal to make reconnection easy.
These tips reflect years of hands-on installs and help you avoid common pitfalls.
Quick answers to common “people also ask” questions
What power does a backup camera draw?
- Most backup cameras draw under 1 amp and run off the reverse light power. Use a few amps fuse to protect the circuit.
Can I install a camera without removing the bumper?
- Yes. You can mount a camera on the license plate or use adhesive mounts that do not require bumper removal. Bumper removal gives cleaner routing but is not always necessary.
Is a wireless camera as good as wired?
- Wired cameras are more reliable and have less interference. Wireless options are easier to install but may suffer from signal drop or delay.
Frequently Asked Questions of how to install car stereo with backup camera
How long does it take to install a car stereo with backup camera?
A basic wired install takes about 2 to 4 hours for most cars. Complexity and dash disassembly can add time.
Do I need professional tools to install a head unit and camera?
Basic tools suffice for many installs. A multimeter and wiring harness adapter make the job far easier and safer.
Can I tap the camera power to a fusebox instead of the reverse light?
You can use a fuse tap to power the camera, but it must be switched only in reverse. Tapping the reverse light is the simplest and safest method.
Will the backup camera work with any aftermarket stereo?
Most modern aftermarket stereos accept a standard RCA video input. Check the head unit specs to ensure video compatibility.
What if the camera image is upside down or mirrored?
Many cameras have a mirror switch or settings in the head unit to flip the image. Check camera orientation and head unit display options.
Conclusion
You now have a clear, practical path for how to install car stereo with backup camera. Gather the right tools, plan your wiring, and test as you go. Take small steps, label wires, and use quality connectors to avoid future problems. Try one small project first or ask a friend for help if it’s your first time. Share your results, ask questions, or subscribe for more guides and tips on car audio and electronics.
