Use your backup camera as a close-range guide, not your only view. In tight spaces, clean the lens, line up straight, reverse slowly, use the parking lines as reference points, and keep checking both mirrors. A clear image and stable 12-volt power matter more than most drivers realize.
Tight parking spaces expose every weakness in a backup camera. A dirty lens, a laggy screen, or poor distance judgment can turn a simple parking move into a stressful one. I’m Ethan Caldwell, and I’ve spent years working on vehicle wiring, cameras, batteries, and charging faults. I’ll show you what actually helps in real garages, narrow alleys, and cramped parking decks.
What Backup Camera Tips for Tight Spaces Mean and Why It Matters
When drivers search for backup camera tips for tight spaces, they usually want one thing. They want to back up with more confidence without scraping a wall, bumper, pole, bike, or garage shelf.
A backup camera is most useful when space is limited. That includes home garages, city parking garages, apartment complexes, alley parking, and crowded lots where inches matter. But the camera only helps if you use it correctly.
I tell drivers to think of the backup camera as one part of a system. Your mirrors, seat position, steering control, parking lines, and camera clarity all work together. If any one of those is off, your margin for error gets smaller fast.
How Backup Cameras Help in Tight Spaces
Field of View, Screen Angle, and Parking Guidelines
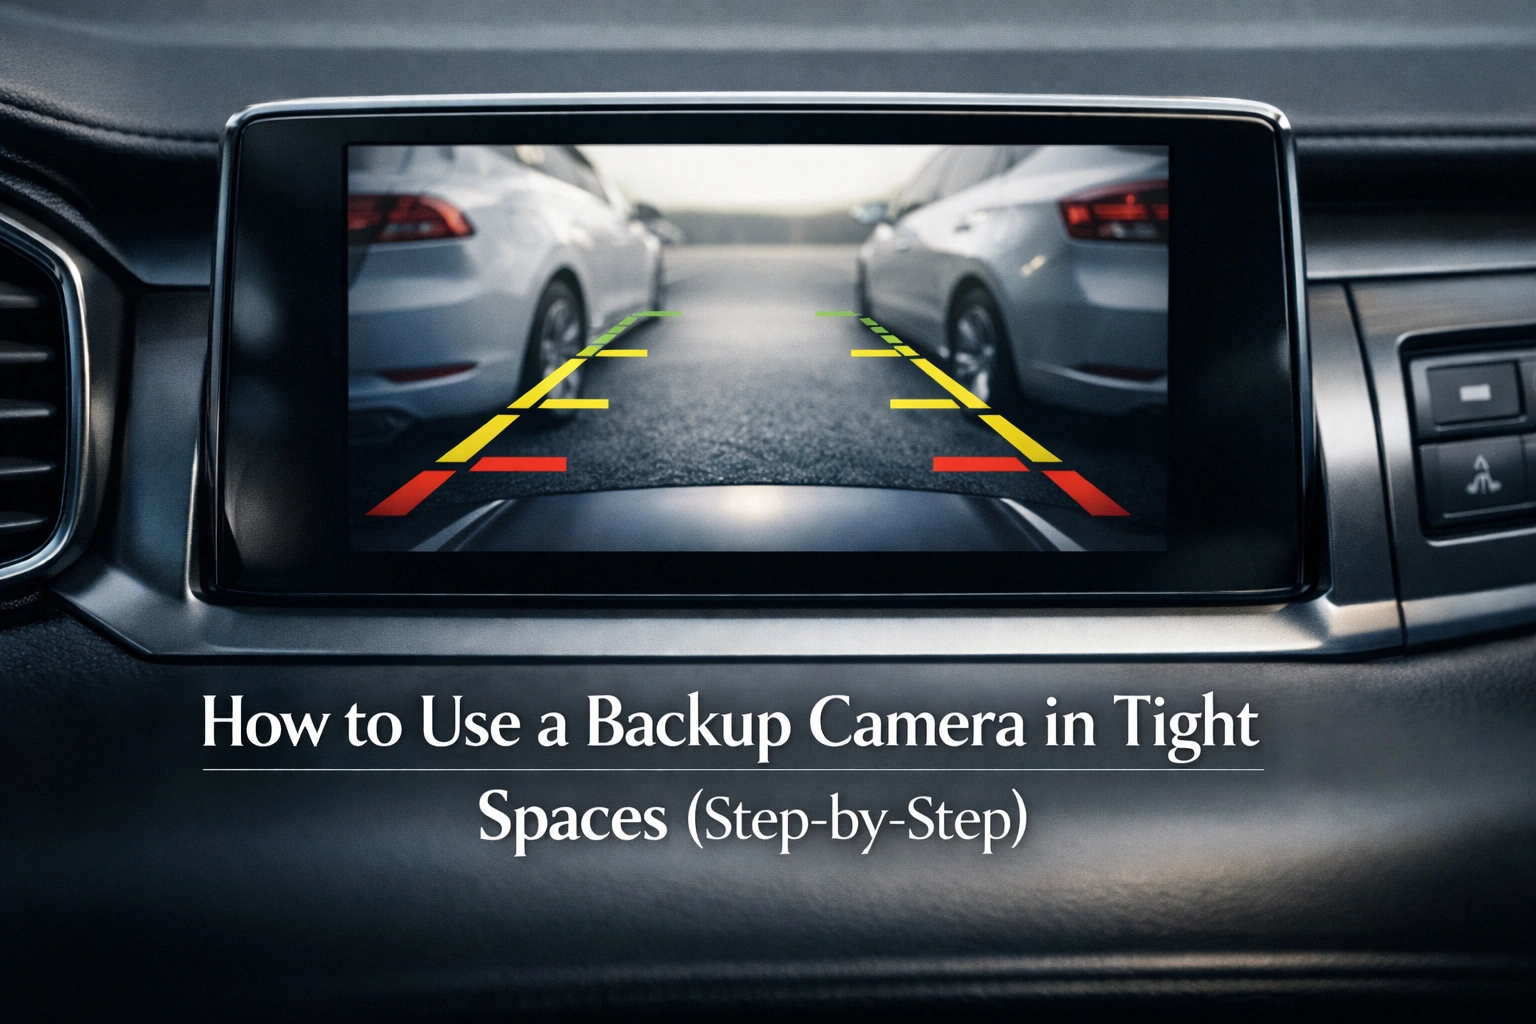
Most backup cameras use a wide-angle lens. That helps you see more of the area behind the vehicle, but it also changes depth perception. Objects can look farther away than they really are. That is why the painted parking lines on the screen matter.
On many systems, the red line shows the danger zone. The yellow area is a caution zone. The green area is where you still have room. Exact distances vary by vehicle and camera angle, so I never tell drivers to trust a generic line blindly. Test your own setup in an open area first.
How Power, Reverse Trigger, and Display Delay Affect What You See
Your camera does not just show an image by magic. It needs power, a ground, and a reverse trigger signal. In most vehicles, that signal comes from the reverse light circuit or a body control module. If voltage is weak, the image may appear late, flicker, or go black just when you are easing into a tight spot.
This is why some drivers complain that their camera is slow only on cold mornings or after the car has been sitting. A weak battery, poor ground, or unstable charging system can delay camera startup.
Why Voltage, Battery Condition, and Alternator Output Matter
This sounds technical, but it matters in the real world. If your battery is weak, the screen may boot slowly. If the alternator is noisy or charging poorly, the image may flicker. If an aftermarket camera is wired incorrectly, it can even drain the battery overnight.
I have seen drivers blame the camera when the real problem was low system voltage. If your car cranks slowly, the radio resets, or the screen flickers during reversing, test the battery and charging system before buying new camera parts.
| Feature | Why It Matters in Tight Spaces | What I Look For |
|---|---|---|
| Wide-angle lens | Shows more area behind the vehicle | Good coverage without too much distortion |
| Parking guidelines | Helps judge distance and alignment | Clear colored lines you can trust after testing |
| Night visibility | Important in dark garages and winter evenings | Bright, low-noise image |
| Screen size | Larger image makes close judging easier | Factory screen or good aftermarket display |
| Stable 12V power | Prevents black screen, lag, and flicker | Healthy battery and clean wiring |
| Fast trigger response | Lets the image appear quickly in reverse | No long delay after shifting |
| Battery Type | Typical Resting Voltage | Backup Camera Impact |
|---|---|---|
| Lead-acid | About 12.6V | Most common; low charge can cause slow screen startup or black image |
| AGM | About 12.7V to 12.8V | Usually more stable for electronics, but poor charging still causes camera faults |
| Lithium 12V system | About 13.2V | Less common; requires compatible electronics and clean voltage control |
For a good basic refresher on battery voltage and charging behavior, I still recommend Battery University.
How to Use a Backup Camera in Tight Spaces (Step-by-Step)
Step 1: Set up before you move. Adjust your mirrors and seat position first. If your side mirrors are poorly aimed, the camera has to do too much work.
Step 2: Clean the lens. Dust, rain spots, salt film, and road grime make the image look farther away and less sharp. In a garage, that blur can hide a low shelf or tool cart.
Step 3: Start straight if you can. I try to square up the vehicle before reversing into a tight spot. The straighter you begin, the easier the lines on the camera are to use.
Step 4: Reverse slowly. Tight-space backing is not the time to roll fast. A slow crawl gives the camera, your eyes, and your steering inputs time to match.
Step 5: Use the guidelines as a reference, not a promise. Watch where the lines move relative to the curb, wall, or painted stall lines. If the car starts drifting, correct early with small steering inputs.
Step 6: Check both mirrors every few seconds. The camera helps behind you, but it will not always show your rear quarter-panel clearing a wall or pillar. In narrow garages, that side clearance is where damage happens.
Step 7: Pause before the last foot or two. I always pause before getting very close. This is the point where wide-angle distortion is most misleading. If needed, stop, verify visually, then finish the move.
Step 8: Watch for delayed image startup. If the screen takes too long to come on, do not keep rolling backward blindly. A weak battery, bad reverse trigger, or voltage drop can delay the camera feed.
Step 9: Test your own stopping point. Use a cone, box, or tape mark in an open area and learn what the red line means on your specific vehicle. Every setup is a little different.
If you are adding or adjusting a camera system, Crutchfield’s backup camera installation guide is a solid reference for fitment and wiring basics.
Best Backup Camera Setups for Tight Spaces Explained
Wide-Angle vs Standard Lens
A wide-angle lens is usually better for garages and small spaces because it shows more of the rear corners. The trade-off is distortion. A standard lens gives a more natural image, but you see less around the edges.
Wired vs Wireless Backup Camera
For tight-space work, I usually prefer wired. It is more stable and less likely to lag. Wireless kits are easier to install, but they can suffer from interference, which is the last thing you want when backing near a concrete wall.
Factory Screen vs Mirror Monitor vs Aftermarket Head Unit
A factory screen is clean and easy to use if the image quality is good. An aftermarket head unit can be a strong option for older cars because it often gives a larger, brighter picture. Mirror monitors work, but the image is usually smaller, which can make close judgment harder.
| Setup Type | Best For | Pros | Cons |
|---|---|---|---|
| Factory backup camera | Drivers who want OEM fit and finish | Clean integration, good switching, stock look | Repairs and upgrades can cost more |
| Aftermarket wired camera | Best overall for tight parking accuracy | Stable signal, less lag, strong image quality | More wiring work |
| Wireless backup camera | Quick installs and simple upgrades | Less cable routing, easier DIY | Possible lag or interference |
| Mirror monitor system | Cars without a factory screen | Affordable, simple, no radio swap needed | Smaller display and less precise viewing |
Common Backup Camera Problems in Tight Spaces and How to Fix Them
| Symptom | Likely Cause | What I Check | Fix |
|---|---|---|---|
| Blurry image in the garage | Dirty lens or moisture inside housing | Lens condition and seal | Clean the lens or replace a leaking camera |
| Black screen in reverse | No power, weak reverse trigger, blown fuse | 12V at camera and reverse signal | Repair power feed, fuse, or trigger wiring |
| Flickering image | Poor ground, voltage drop, alternator noise | Ground connection and charging voltage | Clean ground, reroute wiring, test charging system |
| No signal only in cold weather | Weak battery, connector contraction, moisture | Battery voltage and rear connectors | Charge or replace battery, reseal or repair connector |
| Image appears late after shifting | Slow screen boot or low voltage | Battery condition and reverse trigger response | Fix power supply or upgrade wiring |
| Camera drains battery overnight | Wired to constant power incorrectly | Parasitic draw and power source | Move camera to reverse-switched or proper accessory power |
| Car won’t start after camera install | Short, wrong fuse tap, drained battery | Battery voltage, fuse box, wiring path | Repair wiring and recharge battery |
| Poor night view | Cheap sensor, glare, dirty screen | Camera quality and lens cleanliness | Upgrade camera or reduce light reflection |
Why Low Voltage Causes Tight-Space Camera Problems
If your battery is weak, the camera may boot slowly right when you shift into reverse. That is easy to miss in open lots, but in a tight garage it matters. The same goes for a bad alternator. If charging voltage is unstable, the image can roll, flicker, or cut out with the engine running.
A healthy system usually shows around 12.4 to 12.7 volts with the engine off and around 13.5 to 14.7 volts with the engine running. If readings fall outside that range, I start investigating the battery, connections, and alternator before blaming the camera.
When a Backup Camera Problem Turns Into a Starting Problem
I have seen DIY installs where a wireless monitor or camera was tied to constant power and left active all night. The next morning the battery is low, the car barely cranks, and the camera gets blamed again. If the car has a dead battery overnight after a camera install, treat it like a parasitic draw problem.
In roadside emergencies, a jump starter gets you moving quickly. A battery charger is better when the battery needs a full recovery. If the car will not start, fix that first. Then verify the camera works with stable system voltage.
Common Mistakes to Avoid

Using the camera as your only view. It helps behind you, but side clearance still belongs to your mirrors.
Backing up too fast. Tight spaces reward slow steering and short corrections.
Ignoring lens condition. A dirty camera is one of the simplest causes of bad close-range judgment.
Trusting generic parking lines too much. Test your own camera so you know what the red zone really means.
Skipping electrical checks. If the image flickers, lags, or disappears, test voltage and ground before buying new parts.
Choosing wireless for the wrong vehicle. For long SUVs, trucks, or interference-heavy environments, wired is often safer.
Powering the camera incorrectly. Constant-power mistakes can lead to battery drain or no-start complaints.
Pro Tips and Best Practices
Use a fixed reference point. In your garage, pick a floor mark, wall line, or ceiling point that matches your normal stopping distance.
Make small steering changes. Big wheel inputs create larger rear-end movement than most drivers expect.
Stop once before the final approach. That short pause prevents the last-foot mistake that causes bumper scuffs.
Keep the rear glass and screen clean too. A clean lens will not help much if the display is smudged.
If your camera is inconsistent, test with a multimeter. I check reverse voltage, power at the camera, and ground drop before replacing anything.
Weatherproof every rear connection. Moisture is one of the biggest reasons aftermarket cameras fail after a few seasons.
Tools I Recommend
I like simple tools that solve real problems. For backup camera work, that usually means a good multimeter, a reliable camera kit, trim tools, microfiber cloths, and a power support tool for battery problems.
If you want to compare jump starters and chargers from a major brand, the NOCO official site is a useful place to review current product specs.
| Tool | Why I Use It | Best For |
|---|---|---|
| Digital multimeter | Checks voltage, ground quality, and reverse trigger power | Diagnosing black screens and flicker |
| Trim removal tools | Lets you route wiring cleanly | DIY installs and repairs |
| Microfiber cloth | Keeps the lens and screen clear | Daily garage parking |
| Jump starter | Gets the car started fast when voltage is too low | Roadside or garage emergency |
| Smart charger | Recharges and maintains battery health | Cold weather, storage, repeated low-voltage issues |
| OBD2 scanner | Helpful on newer vehicles with factory integration faults | Advanced diagnostics |
Jump Starter vs Battery Charger: What Helps When the Camera and Car Both Act Up?
| Tool | Best Use | Works Fast? | Limitation |
|---|---|---|---|
| Jump starter | Car won’t start now and you need quick power | Yes | Does not fully recharge a weak battery |
| Battery charger | Battery is low after overnight drain or storage | No | Takes time and needs an outlet |
My first pick for tight spaces because wired systems usually give a more stable image with less lag.
Automotive Digital Multimeter
This is the tool I use most when a backup camera has no signal, flickers, or acts up in cold weather.
Useful when low voltage leaves you with a dead screen, a weak battery, and a car that won’t start in the garage.
FAQ
How do I use a backup camera in a tight garage?
Start straight, clean the lens, reverse slowly, use the lines as a guide, and keep checking both mirrors. I always pause before the last foot or two.
Are backup camera parking lines accurate?
They are helpful, but not perfect. The exact distance depends on the camera angle, screen size, and vehicle setup, so test your own system first.
Why does my backup camera lag when I shift into reverse?
Lag can come from slow screen startup, weak battery voltage, poor reverse trigger wiring, or wireless signal delay.
Can a weak battery affect a backup camera?
Yes. Low voltage can cause delayed startup, flicker, black screens, or random resets, especially in cold weather.
Is wired or wireless better for tight parking spaces?
Wired is usually better for accuracy and reliability. Wireless is easier to install, but it can lag or pick up interference.
What should I do if my camera is blurry only in cold or wet weather?
Check for lens condensation, water intrusion, salt film, or a weak battery. Moisture and low voltage are both common cold-weather causes.
Conclusion
The best backup camera tip for tight spaces is simple. Use the camera as a precise helper, not your only source of truth. Clean visibility, slow movement, mirror checks, and solid electrical health make the biggest difference. If your camera keeps acting up, test the wiring and battery before replacing parts. A little setup and practice goes a long way.


