
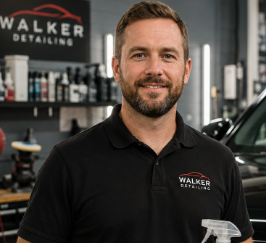
By James Walker
Quick Answer: Here is how to clean cloth upholstery in car seats: vacuum thoroughly, test a mild upholstery cleaner on a hidden spot, work it in lightly with a soft brush, blot with clean microfiber, and let the seats dry fully with the doors open. Use as little water as you can.
It is Saturday, 7:45 AM. The coffee in your cup is hot, the driveway is quiet, and the back seat of your sedan still wears last month’s road-trip crumbs and one mystery smudge. Good news: cleaning cloth upholstery in your car fits neatly into one relaxed morning.
This guide follows that Saturday hour by hour. You will identify your fabric, gather simple gear, clean step by step, handle stains, and finish with protection that keeps the seats looking fresh.
Please note: This article is for general educational and planning guidance. It does not promise specific results and works alongside advice from qualified professionals. Some tasks, such as deep odor or mold treatment, upholstery repair, and anything near airbags or wiring, are best handled by a trained professional. Please check your vehicle’s owner’s manual and the product label, and test on a small hidden area first.
7:45 AM: Know Your Fabric Before You Touch It
Cloth car seats are usually woven or knit polyester, nylon, or a blend. Some are flat weave, some are plush velour, and some have a soft “microfiber” feel. The fabric matters because it decides how much moisture and scrubbing it can handle.
Myth: More water and more scrubbing means a deeper clean. Reality: Cloth seats sit on thick foam. Soaked foam can hold moisture for days, which may lead to musty smells and water rings. A light, controlled approach tends to work better.
Why does this matter beyond looks? Clean seats feel better on a hot commute, hold fewer allergens and dust, and can support resale value when you sell or trade in. A beginner can start by checking the owner’s manual for the seat-care section, then looking for any fabric tags under the seat or on the cushion edge.
Cleaner Types for Cloth Seats Compared
Takeaway: Start with the gentlest option that fits the mess. Move up only if the first round does not lift it.
8:15 AM: Gather Your Gear and Run the Pre-Check
A tidy kit makes the job smoother. You do not need pro equipment. Many owners find that a few basics cover most cloth seats in a daily-driver sedan or a family minivan.
A crevice attachment reaches the seams where crumbs hide. A brush attachment lifts loose dirt from the weave before any liquid touches it.
Soft bristles loosen dirt without fuzzing the fabric. A stiff brush can rough up fibers, so skip it on velour and microfiber-style cloth.
Have at least four on hand. Light-colored ones help you see how much dirt transfers, which tells you when a spot is done.
Pick a product labeled for automotive or general upholstery. A fine mist gives you control and keeps the foam underneath from soaking up liquid.
Before you start, run a quick pre-clean check. The panel below shows what to look at, and what each answer usually means.
Pre-Clean Checklist Dashboard
Read this as a quick filter. If any box stays unchecked, pause and sort it out first. The airbag and sensor boxes matter most, because those seats need extra care with moisture.
Safety Note: Many front seats have side airbags built into the seat edge, and some have occupant-sensing mats under the cushion. Avoid soaking these seats and avoid pushing liquid into seams near airbag labels. For general airbag information, see NHTSA’s air bag safety page. Open the doors for airflow while you work, and read the cleaner label for ventilation guidance.
9:00 AM: Choose a Safe Product Path
Picking a product feels harder than it is. Follow the path below from fabric to method, and you will land on a sensible choice almost every time. This is general guidance, so your label and manual still have the final say.
Safe-Use Decision Path
Confirm it is cloth, not vinyl or leather
Choose a fabric-safe, mild cleaner
Try a hidden patch, wait until dry
Mist, agitate softly, blot, dry
In practice, step 3 saves the most heartache. If the test patch shows color transfer or a stiff texture after drying, switch to a gentler cleaner or ask a detailer.
9:30 AM: How to Clean Cloth Upholstery in Car, Step by Step
Now the main event. Work one seat at a time, and finish each section before moving on. On a typical sedan, expect about 20 to 30 minutes per seat once you settle into a rhythm.
Tip: Work in a pattern, such as top to bottom and left to right. A steady pattern helps you avoid missed strips and the faint “tide lines” that can appear where cleaned and uncleaned fabric meet.
Here is how the whole workflow compares in effort. The bars are general guidance for a typical moderately dirty seat, not lab measurements.
Relative Effort by Stage (practical guide)
The takeaway: most of your effort goes into the brush-and-blot stage, while drying is mostly waiting. Do the careful work there and let airflow do the rest.
10:30 AM: Tackling Stains and Stubborn Spots
A parent with a minivan and a toddler knows this scene well: juice on the cushion, crackers in the seams, and a dark ring where a milk cup tipped. Stains behave differently, so it helps to know what you are dealing with.
Common Cloth Seat Issues and Likely Causes
If a stain lingers, use a gentle-to-stronger ladder. First, blot with plain water. Second, use your mild cleaner. Third, try an enzyme cleaner for food, milk, or pet stains. Stop and call a detailer if the fabric changes color or the stain keeps spreading. Cool water is usually the safer starting point, since heat can set some stains.
Heads-Up: Bleach, strong solvents, and harsh household cleaners can fade or weaken car fabric and may harm the stitching and foam. Skip them unless the product label specifically says it is safe for automotive upholstery.
11:30 AM: Habits That Help and Habits That Hurt
A seasoned detailer thinks in habits more than products. Small choices add up, especially in a daily commuter or a rideshare car that sees several riders a day.
Best-Practice Use vs. Less-Effective Use
Takeaway: Gentle, frequent care beats occasional heroic scrubbing.
Different drivers need different approaches. This fit table shows which setup tends to suit which situation.
Product and Method Fit by Driver Type
Here is a quick look at how the material side stacks up across common interior surfaces, so you can see where cloth sits.
Seat Material Fit Dashboard
Moisture control is key. Use mist, blot, dry well.
Wipes clean easily. Avoid harsh solvents.
Needs leather-specific cleaner and conditioner.
Uses a dedicated cleaner and a very soft brush.
The point is simple: cloth is forgiving about scuffs, but less forgiving about moisture. Choose your product by material, not by habit.
12:30 PM: What Experienced Detailers Notice First
Take a lunch break, then walk around the car with fresh eyes. Pros tend to notice things beginners miss. These six habits can raise the quality of your work.
Dirt collects along stitching and under seat skirts. A crevice tool and a soft brush reach where a quick wipe cannot.
The side bolsters take the most wear from sliding in and out. Extra light brushing here helps keep the fabric from shining or matting.
A clean seat feels soft, not tacky. Tackiness often means leftover cleaner, which attracts new dirt faster.
Wet seats can drip onto carpet and mats. Placing a towel under the seat edge while you work helps protect the floor and avoids slippery pedals.
Child seats, headrests, and seat belts can hide spills underneath. Remove child seats per their manual, clean the area, and reinstall them correctly.
A fabric protectant labeled for automotive cloth may help repel spills. Apply it only once the seat is fully dry, and check the label for cure time.
When to contact a professional: Call a detailer or upholstery specialist for strong or lingering odors, visible mold, large deep stains, torn seams, or damaged foam. Also book a pro for any work that involves removing seats, touching airbag components, or handling wiring and seat sensors.
Note: Smells in cloth seats often come from the cabin as much as the fabric. If a smell comes back after cleaning, check for damp carpet, a clogged cabin air filter, or a leak. The EPA’s indoor air quality pages offer general guidance on moisture and ventilation.
1:30 PM: DIY or Hire a Pro?
Most light-to-moderate cleaning fits a driveway Saturday. A few jobs are better left to someone with training and the right equipment.
DIY vs. Professional Help
This article may contain affiliate links. If you buy through these links, we may earn a small commission at no extra cost to you. We only mention products that are relevant to the topic and they work alongside advice from qualified professionals.
2:30 PM: Gear That Can Make the Job Easier
If you plan to clean cloth upholstery in your car more than once or twice a year, a few tools may be worth owning. Both picks below are general product types, so compare sizes, reviews, and specs on the page that suits your vehicle.
Portable Upholstery Spot Cleaner / Extractor
A compact extractor may support deeper cleaning of spills and heavier soiling by pulling liquid back out of the fabric. Check that the cleaning solution is compatible with automotive cloth, and read the label before use.
Soft-Bristle Upholstery Brush and Microfiber Towel Set
A soft brush and a stack of clean towels can help make agitation and blotting easier and gentler on fabric. Look for soft bristles and check that the towels are suitable for interior surfaces.
3:30 PM: Keep the Fresh Look Going
You have finished the hard part. Now a few easy habits will help keep the seats in shape. For general cleaning-product safety and use tips, the American Cleaning Institute is a helpful reference.
Smaller cabins dry quickly with the doors open. A weekly quick vacuum and a monthly spot check usually keep things neat.
More seats mean more seams to vacuum. Clean one row at a time and allow extra drying time for third-row and bench seats.
Think of the weekly routine as a five-minute reset: shake out the mats, vacuum the seat surfaces, blot any new marks, and keep a small spill kit in the trunk. Seasonal care matters too. In summer, a sun shade can help limit fading. In winter, wet boots and road salt can leave marks, so wipe damp areas before they dry.
Frequently Asked Questions
How do you clean cloth upholstery in a car at home?
Vacuum the seat well, test a mild fabric-safe cleaner in a hidden spot, mist a small area, brush gently, and blot with clean microfiber. Let the seat dry fully with the doors open before you close the car.
Can I use dish soap on car cloth seats?
A very small amount of mild dish soap diluted in water is often used for spot cleaning. Use sparingly, test first, and blot with plain water afterward, since leftover soap can leave a sticky film that attracts dirt.
How long do cloth car seats take to dry?
It depends on how much liquid you used, the weather, and airflow. Lightly misted seats may dry in a few hours with doors open, while heavier cleaning can take longer. If a seat still feels damp, keep the airflow going.
How do I remove old stains and smells from cloth seats?
Try the gentle ladder: plain water, mild cleaner, then an enzyme cleaner for organic stains and odors. Repeat with light moisture instead of soaking the seat. If a smell or stain stays after two rounds, ask a professional.
Is steam safe for cloth car seats?
Steam can be used by some detailers, but it adds heat and moisture near seat sensors, heating elements, and airbags. Check your owner’s manual first, and consider leaving steam work to a trained professional.
When should I hire a professional to clean my car seats?
Consider a pro for mold, strong or persistent odors, large deep stains, damaged seams or foam, and any job that involves removing seats or working near airbags and wiring.
Final Thoughts
Cleaning cloth car upholstery does not need to be a chore. Vacuum first, use a mild cleaner with a light mist, brush softly, blot well, and let the seats dry with plenty of airflow. Repeat small, steady habits through the year, and your seats may stay fresher for longer.
Always check your owner’s manual and the product label, test on a small hidden spot first, and reach out to a qualified professional for mold, deep odors, seat repair, or any work near airbags and wiring. A good Saturday morning can go a long way.
