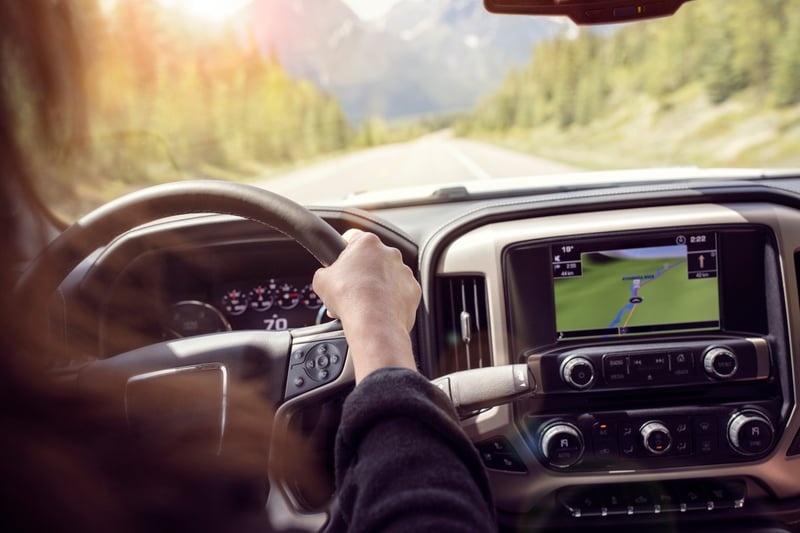
You want to use your reverse camera to park and back up with more confidence and less guesswork. Start by trusting the camera as a guide, not as the only source of information, and learn what the on-screen lines and distances mean so you can judge space and obstacles quickly. Use the camera to check behind the vehicle, align with the guide lines, and keep looking over your shoulder to confirm what the camera shows.
This post shows simple steps to set up, adjust, and use your reverse camera safely. It also points out common mistakes to avoid and quick fixes if the image is blurry or the guidelines don’t match your bumper, drawing on practical tips from people who work with vehicle electrical systems.
Key Takeaways
- Learn what the camera lines and colors mean to judge distance accurately.
- Position and adjust the camera so the view matches your bumper and mirrors.
- Combine camera use with shoulder checks and simple maintenance checks.
What Is a Reverse Camera?
A reverse camera is a small video camera mounted on the rear of a vehicle. It sends a live video feed to a dashboard screen to help the driver see obstacles, people, or vehicles behind the car.
Key Features of Reverse Cameras

Most reverse cameras provide a wide-angle view, usually between 120° and 180°, so the driver can see a broad area behind the vehicle. Many include guideline overlays that show estimated distances; these lines help judge how much space remains when backing up. Some cameras add night vision using infrared LEDs or low-light sensors to improve visibility in the dark.
Image quality varies by resolution. Higher resolution (720p or 1080p) gives a clearer picture for spotting small hazards. Weatherproofing is common; cameras often carry an IP rating (e.g., IP67) to resist water and dust. Many units automatically power on when the car shifts into reverse, triggered by the reverse light circuit.
Types of Reverse Cameras
Wired reverse cameras connect to the head unit with a video cable (usually RCA). They deliver stable signals and lower latency but need routing cable through the vehicle during installation. Wireless cameras use a radio or Wi‑Fi link to send video to the screen. They are easier to install but can suffer interference or lag.
Camera designs include bumper-mounted flush units, license-plate frame cameras, and high-mounted units near the rear window or tailgate. Some systems integrate with parking sensors and task a single display for both camera feed and sensor alerts. Aftermarket and factory-fitted options exist; factory systems often integrate better with the vehicle’s software and screens.
How to Install a Reverse Camera
This section explains how to pick a camera, the main steps to fit and wire it, and when to hire a pro versus doing it yourself. It focuses on lens type, mounting, power and video wiring, and common pros/cons for DIY or professional installs.
Choosing the Right Reverse Camera
They should pick a camera that matches the vehicle and budget. Resolution, field of view (FOV), and mounting style matter most. A camera with at least 720p resolution gives clearer images at night and in bright sun. Look for a 120°–170° FOV to reduce blind spots without excessive fisheye distortion.
Mounting options include license-plate bracket, bumper flush-mount, and third-brake-light integrated units. Wired cameras give a steady, lag-free picture. Wireless units avoid long cable runs but may suffer interference and require a constant power feed. For wet climates, choose IP67 or higher water resistance and consider built-in heater or wide temperature range.
Use this table to compare common features:
| Feature | Wired Camera | Wireless Camera |
|---|---|---|
| Image Stability | High | Variable |
| Installation Complexity | Moderate–High | Low–Moderate |
| Interference Risk | Low | Medium |
| Range of Motion / Mount Types | Many | Fewer |
Basic Installation Steps
They should gather tools: screwdriver set, wire strippers, multimeter, drill (if needed), zip ties, and electrical tape. Park on level ground, disconnect the battery, and choose a mounting spot that centers the view and avoids obstacles like the exhaust or license lights.
Mount the camera using the chosen bracket or flush-fit. Route the video and power cables from the trunk or bumper to the monitor or head unit. For wired systems, run the video cable through the vehicle interior, avoiding sharp edges and hot parts. Connect camera power to the reverse light circuit so the camera turns on when the car is in reverse. Test the image before finalizing mounts and secure all cables with zip ties and grommets to prevent chafing.
Professional Installation vs DIY
They should weigh time, skill, and warranty needs. DIY saves money and suits those comfortable with basic wiring and panel removal. Typical DIY tasks include drilling a mounting hole, routing cables behind trim, and tapping the reverse light for power. A multimeter and patience make this achievable in 1–3 hours for many sedans.
Hire a professional when the vehicle has complex electronics, factory infotainment integration, or tight warranty rules. Professionals handle CAN-bus systems, run video to factory screens, and hide wiring cleanly. Costs vary; expect a simple install to start around a modest fee and rise with integration complexity.
Setting Up Your Reverse Camera System
This section shows how to power and configure the camera, aim it for the best view, and verify every function works before driving. Follow each step carefully and use the camera’s menu and vehicle wiring as described.
Initial Configuration
They should first connect the camera power to the vehicle’s reverse light circuit so the camera turns on only when reverse gear engages. Locate the reverse light wire at the rear light cluster, strip a small section, and use a quality tap connector or solder and heat-shrink for a secure join. Connect the camera ground to bare metal chassis nearby and confirm the monitor’s ground is solid too.
Next, connect the video cable or wireless transmitter to the monitor input. Power the monitor from ACC or a fused ignition source if it needs to stay on with the car. Open the camera menu and set brightness, contrast, and guideline display. If the camera has a mirror mode, set it to match the monitor so the image aligns with the driver’s steering view.
Adjusting Camera Angle
They should mount the camera at the vehicle’s centerline when possible, about 30–60 cm above the bumper for a balanced view. Use the included bracket to tilt the camera until the bumper edge sits at the bottom of the screen, giving good depth perception without cutting off nearby objects.
Adjust the horizontal angle so both rear corners are visible. Test by placing cones or markers behind the vehicle at known distances (1 m, 2 m, 3 m). Change the tilt in small steps and recheck the markers on-screen until the spacing looks natural. Tighten mounting screws and use thread locker if the camera sits on a vibrating bumper.
Testing Camera Functionality
They should verify the camera activates when reverse gear engages and the monitor displays a clear image. With the engine on and parking brake set, shift into reverse and watch for video latency, flicker, or audio noise. If the image is intermittent, check all power and ground connections and replace any split or corroded connectors.
Test the guideline accuracy by backing toward the test markers slowly. Confirm that distance lines correspond to real distances and that any dynamic guidelines move correctly with steering input. Finally, test in low light and bright sunlight to ensure the camera’s exposure control works; adjust brightness or install an anti-glare shield if the image washes out.
How to Use Reverse Camera Safely
A driver should know how the camera’s guides work, what each visual signal means, and how to use mirrors and the camera together. Doing those three things reduces blind spots and helps avoid obstacles while reversing.
Reading Camera Guidelines
Most cameras show colored lines that mark vehicle width and distance. Green lines usually mean safe space, yellow warns to slow down, and red means stop or very close. Some systems add blue or white lines that show the car’s projected path when the steering wheel is turned.
Adjust the guidelines if they look off. Park with the car straight, measure a known distance from a wall (for example 1 m), and tweak the settings until the on-screen lines match real positions. If the camera uses dynamic lines, test them at low speed to confirm they follow the steering accurately.
Always remember that camera lines are a guide, not exact measurements. Factors like camera angle, bumper shape, or a dirty lens will change how lines appear.
Interpreting Visual Signals
Cameras sometimes show extra warnings like beeps, colored zones, or flashing segments for very close objects. A steady beep often starts at moderate distance; faster beeps or continuous tone means immediate stop. Visual overlays such as shaded boxes mark hazard zones behind the vehicle.
Combine visual cues with known distances: for many systems, yellow begins about 1–1.5 meters behind the bumper and red within 0.5 meters. If the display shows obstacle icons or cross-traffic alerts, treat them as prompts to check mirrors and get out to inspect if needed. Keep the camera lens clean; dirt, snow, or rain can cause false or missed signals.
Combining Mirror and Camera Views
The best practice uses camera, mirrors, and a physical walk-around when space is tight. The rearview and side mirrors show traffic and low obstacles that the camera might miss, such as curbs or small children near the corners of the car. Look over both shoulders to confirm blind spots the camera cannot display.
Use the camera for close-range depth and trajectory, mirrors for lane and side clearance, and shoulder checks for areas below the camera’s field. When hitching a trailer, align with the hitch using the camera while a helper watches side clearance in mirrors or by signaling. For more details on safe reversing techniques, reliable resources include general vehicle safety pages like backup camera.
Common Mistakes When Using a Reverse Camera
Drivers often make a few predictable errors that reduce the camera’s usefulness. Fixing these mistakes requires simple changes: still look around, adjust the camera and screen, and use short, regular glances at the display.
Overreliance on Technology
Relying only on the camera can hide hazards outside the camera’s field of view. The camera gives a limited view—usually straight back and slightly down—so low objects near the bumper, pedestrians approaching from the side, or moving vehicles in adjacent lanes may not appear on screen.
Drivers should use the camera as one tool among several. Check mirrors, turn and look over the shoulder, and listen for warnings from sensors. If the camera image is dark, blurry, or misaligned, stop and fix the issue before continuing. Regularly clean the lens, confirm the mount angle, and test the view in daylight and low light to ensure the camera remains a reliable aid.
Ignoring Surroundings
Some drivers assume the camera shows the whole scene and stop scanning the environment. Blind spots still exist around the vehicle, such as the area directly to the sides and close to the rear bumper. Children, pets, and shopping carts can enter these zones quickly.
Drivers should perform a quick visual sweep before reversing and keep scanning while backing up. Use mirrors to check side lanes and windows to watch for motion. When parked on hills or near tight spaces, exit briefly to inspect the area if the camera view is obstructed or limited.
Improper Screen Glance
Staring too long at the screen or glancing too briefly both cause problems. Long stares remove awareness of sounds and motion outside the vehicle. Too-quick glances miss important depth cues and moving objects on screen.
Drivers should use short, frequent glances—about one to two seconds each—combined with quick mirror checks. Position the display so it is easy to glance at without turning the head sharply. Adjust screen brightness and contrast to reduce the need for prolonged viewing in bright sunlight or at night.
Maintaining and Troubleshooting Your Reverse Camera
Keep the lens clean, check wiring and connectors, and try a system reset if the display won’t show an image. Regular checks every few months and after harsh weather help keep the camera reliable.
Cleaning Camera Lens
They should clean the lens gently with a soft microfiber cloth to avoid scratches. First, rinse loose dirt with water or a mild car-wash solution to remove grit that could abrade the glass.
Next, wipe in a circular motion until the image clears. Avoid household glass cleaners that contain ammonia; these can damage lens coatings and plastics.
For stubborn grime, use a small amount of isopropyl alcohol on the cloth, not directly on the lens. If the camera sits low on the bumper, check for road salt buildup in winter and rinse thoroughly after driving on salted roads.
Inspect the housing for cracks or loose seals while cleaning. Replace or reseal the housing if water or fog appears inside the lens.
Identifying Signal Issues
They should confirm whether the screen shows “no signal,” a black screen, or distorted video; each symptom points to different causes. A loose coax or RCA cable often causes intermittent video or no image at all.
Check the camera power wire (usually tied to reverse light power) for voltage when the vehicle is in reverse. Use a multimeter to verify 12V arrives at the camera connector.
Inspect connectors for corrosion, bent pins, or damage and secure any loose plugs. If the camera image shows lines or interference, look for nearby high-current wiring or aftermarket electronics that may introduce noise; reroute or add ferrite cores to signal cables if needed.
If the issue appears only at night, test the camera under low light and check IR LEDs or exposure settings in the head unit.
Resetting the System
They should try a soft reset before replacing parts. Turn the vehicle off, open and close the driver door, then wait 30 seconds before restarting; this can reset the head unit in many vehicles.
If that fails, perform a factory reset through the infotainment menu; note that this may erase paired phones and radio presets.
For cameras with separate power or control modules, disconnect the negative battery terminal for 60 seconds to clear stored faults, then reconnect. After any reset, test the camera by engaging reverse and watching for image return and guide lines.
Document any patterns (works after a cold start, fails when warm, etc.) to help decide if wiring, module, or camera replacement is needed.
Advanced Tips for Maximizing Reverse Camera Benefits
These tips show how to use the camera’s on-screen guides and improve low-light performance. They focus on practical settings, positioning, and driving steps that reduce blind spots and make reversing safer.
Using Grid Lines Effectively
Drivers should calibrate the grid lines to match their vehicle’s bumper and wheelbase. They can adjust vertical and horizontal offsets in the camera settings so the outer lines align with the vehicle edges as seen from the driver’s seat. When lined up correctly, the green/yellow/red bands show safe, caution, and stop zones more reliably.
Use the grid lines to steer, not to replace shoulder checks. Turn the wheel until the projected path lines up with the intended parking space. On narrow streets, watch the outer lines to avoid scraping curbs or posts. If the system allows toggling guidelines, enable dynamic lines that move with the steering for better path prediction.
If the lines look wrong after replacing the camera or changing the bumper, run the calibration routine or visit a shop. Incorrect lines create false confidence and can lead to misjudged clearances.
Nighttime Use Strategies
Drivers should clean the lens before night drives; even small smudges scatter light and blur the image. Wipe the camera with a soft cloth and check for condensation inside the housing. Replace cracked housings that let moisture in.
Adjust display brightness and contrast for low light. Lower brightness to reduce glare from streetlights, or increase contrast to make obstacles stand out. If the camera has IR or low-light mode, enable it and test at home to learn how objects and pedestrians appear on screen.
Combine the camera with reverse lights and slow, controlled backing. Move at walking speed so the camera feed updates clearly and the driver can react to sudden obstacles. If glare from other vehicles impairs the view, angle the vehicle slightly and use mirrors to confirm before continuing.
FAQS
People often ask if a reverse camera replaces mirrors and looking back. It does not. It adds a view behind the vehicle, but drivers should still check mirrors and turn their head for blind spots.
Can reverse camera guidelines be trusted for distance? They give a rough estimate. Green, yellow, and red or fixed lines show safe zones, but drivers should use caution and judge distance with mirrors and sensors if available.
What if the camera image is washed out at night? Low-light performance varies by model. Clean the lens, check for glare from lights, and use the vehicle’s reverse lights to improve visibility.
How often should the camera lens be cleaned? Clean it as needed, especially after rain, snow, or mud. A soft cloth and mild cleaner keep the view clear and prevent scratches.
Will the camera work while driving forward? Most systems only show the rear view in reverse. Some vehicles allow manual activation of the camera, but driving with the rear view on can distract the driver.
What about alignment and calibration? If guidelines look off, the camera may need adjustment. A technician can recalibrate or realign the camera for accurate guidance.
Is a reverse camera enough for tight parking? It helps a lot, but drivers should still use slow, steady maneuvers and check surroundings. Combining the camera with mirrors and sensors gives the best results.
Conclusion
Using a reverse camera helps drivers see behind the vehicle and reduces blind spots. It gives a clear view for parking and low-speed maneuvers, but it does not replace mirrors or looking over the shoulder.
Drivers should use the camera together with mirrors, sensors, and direct checks. They must be aware of camera limits like glare, low light, and dirty lenses. Regular cleaning and calibration keep the image reliable.
Practice with the camera in a safe space until the driver understands the distance guides and moving lines. That builds skill and trust without creating overreliance. Short practice sessions improve judgment more than long, distracted use.
If the camera shows a fault, the driver should check connections and the lens, then seek professional repair if needed. Keeping the system in good condition ensures it remains a useful aid.
Bold points to remember:
- Always check mirrors and blind spots.
- Clean the lens regularly.
- Know the camera’s distance guides.
- Use sensors and direct vision together.
These steps help drivers use reverse cameras safely and effectively.


