Backup camera guidelines improve visibility by giving you distance and alignment references on the screen. They help you center the vehicle, judge bumper clearance, and spot curbs or low obstacles more clearly, but they work best when the camera is mounted correctly and used with mirrors.
Backing up looks simple until space gets tight. A driveway, garage, or crowded parking lot can change fast.
I’m Ethan Caldwell, and I’ve spent years working with vehicle wiring, reverse camera installs, battery voltage problems, and real-world visibility issues. In this guide, I’ll show you how backup camera guidelines really work, how to use them properly, and how to fix the most common problems.
Quick Answer: Do Backup Camera Guidelines Improve Visibility?
Yes. Backup camera guidelines improve visibility by adding visual reference lines to the rear camera image. Those lines help you judge distance, keep the vehicle centered, and avoid hitting low objects behind the bumper. They are helpful, but they are not exact measurements, and they do not replace mirrors or a shoulder check.
What Backup Camera Guidelines Are and Why They Matter
Simple definition for beginners
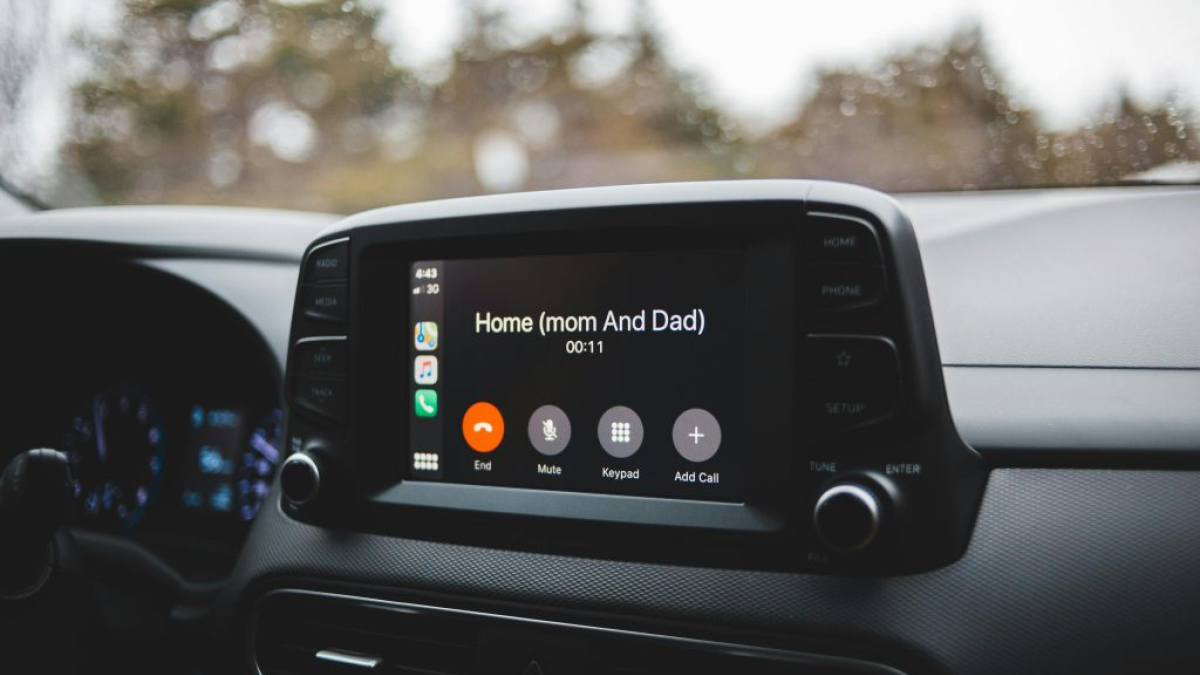
Backup camera guidelines are the colored lines you see on a rear camera screen when the vehicle is in reverse. They are there to help you understand where your car is headed and how much space you have behind you.
What the red, yellow, and green lines usually mean
Most systems use color to show approximate distance. Green usually marks the farthest safe reference area. Yellow shows a caution zone. Red marks the closest warning zone near the rear bumper.
| Guideline Color | What It Usually Means | How to Use It |
|---|---|---|
| Green | Farther clearance zone | Good for lining up early while reversing |
| Yellow | Closer caution zone | Slow down and check mirrors again |
| Red | Very close to bumper | Stop and confirm space before moving farther |
Why better visibility matters in U.S. parking lots, driveways, and garages
In the USA, a lot of drivers back out of tight suburban driveways, apartment lots, school pickup lines, and packed store parking spaces. That is where backup camera guidelines help most. They make it easier to stay centered, avoid scraping a bumper, and see where the vehicle is tracking.
They are especially helpful for beginner drivers, SUVs, pickup trucks, and older vehicles that did not come with great rear visibility from the factory.
How Backup Camera Guidelines Work on a Car
Camera, display, and reverse trigger signal
The system is usually simple. A rear camera sends video to a dash screen or mirror monitor. When you shift into reverse, a 12V reverse trigger signal tells the screen to switch over to the camera view.
On many aftermarket setups, the camera gets power from the reverse light circuit. That means wiring quality, ground quality, and battery voltage all matter. If voltage drops too low, the image can flicker, delay, or fail to appear.
Fixed guidelines vs dynamic guidelines
Fixed guidelines stay in one position on the screen. They are common on aftermarket cameras. Dynamic guidelines move with steering input, so they bend as you turn the wheel. That is more common on OEM systems and better integrated head units.
Dynamic lines are usually more useful in tight parking because they show the path the vehicle is likely to follow. Fixed lines are simpler and still helpful, but they do not react to steering changes.
How camera angle, voltage, and screen size affect line accuracy
If the camera is tilted too high or too low, the lines will not match the real space behind the car. If the screen is small or low quality, the references are harder to read. And if the battery is weak or the alternator is not charging properly, the image can become unstable.
I have seen this after a car would not start in cold weather or after a battery died overnight. The driver gets the car going with a jump starter, but the backup camera still flickers or fails because system voltage is unstable or a fuse popped during the event.
| Electrical Check | Normal Reading | What It Means for the Camera |
|---|---|---|
| Battery at rest | About 12.6V | Healthy battery usually supports normal screen and camera operation |
| Weak battery at rest | About 12.2V or lower | Possible delayed camera startup or dim display |
| Engine running | About 13.5V to 14.7V | Alternator charging normally and supplying stable system voltage |
| Voltage drop in reverse circuit | Lower than expected | Can cause flicker, black screen, or disappearing guidelines |
For a good basic explanation of 12V battery behavior, I like Battery University. It is useful when a camera issue turns out to be a voltage issue.
How to Use Backup Camera Guidelines for Better Visibility (Step-by-Step)
Step 1: Check mirrors before you move
Always start with your mirrors. The screen shows the rear area, but your mirrors show side traffic, pedestrians, and the edges of the space around the vehicle.
Step 2: Use the center line to stay aligned
If your system has a center guideline, use it to keep the vehicle straight. This is helpful when backing into a space, lining up with a garage, or connecting to a trailer.
Step 3: Read the distance lines correctly
Use the color lines as approximate references, not perfect measurements. If an object reaches the red zone, slow down and confirm your clearance.
Step 4: Reverse slowly and recheck side traffic
Move slowly. In a parking lot, glance back to both sides. The camera image helps behind the vehicle, but it may not fully show cross traffic moving past your rear corners.
Step 5: Confirm with a final mirror and shoulder check
Before you finish the maneuver, stop if needed and recheck your surroundings. A screen cannot replace real awareness.
- Shift into reverse and confirm the camera view comes on
- Check both side mirrors
- Use the center line to keep the vehicle aligned
- Watch the yellow and red zones as you move back
- Recheck traffic and blind spots before completing the maneuver
How to Adjust or Calibrate Backup Camera Guidelines

When adjustment is needed
You may need to adjust the guidelines if the lines look crooked, do not match the vehicle center, sit too high on the screen, or seem far off from real bumper distance. This often happens after a new camera install, a tailgate replacement, a bumper repair, or a battery disconnect that reset head unit settings.
Simple DIY calibration process
This is the process I use for many aftermarket systems:
- Park on level ground
- Set the parking brake and keep the area clear
- Place straight reference objects behind the vehicle, like tape lines or small cones
- Turn the ignition on and switch to reverse
- Access the camera or monitor guideline setting if your system allows it
- Center the main line with the vehicle midpoint
- Adjust distance lines so the red line better matches safe bumper clearance
- Test again slowly before trusting the setup
If the camera itself is physically mounted crooked, software adjustment will only help so much. You may need to loosen the bracket and aim the camera again.
When professional calibration is the better choice
If the system uses dynamic guidelines tied to a steering angle sensor, ADAS functions, or an OEM head unit, I recommend professional calibration. That is especially true after collision repair, tailgate replacement, or module replacement.
Fixed vs Dynamic vs No Guidelines: Which Works Best?
What each type does well
Fixed guidelines are simple and common. Dynamic guidelines are more accurate during turns. No guidelines give a cleaner image but less visual help for beginners.
Best choice for cars, SUVs, trucks, and trailers
| Type | Best For | Main Advantage | Main Drawback |
|---|---|---|---|
| Fixed guidelines | Most aftermarket installs | Simple, easy to read, low cost | Do not move with steering input |
| Dynamic guidelines | OEM systems, tight parking, larger vehicles | Better path prediction while turning | More complex and harder to calibrate |
| No guidelines | Drivers who prefer a clean screen | Unobstructed camera image | Less help with alignment and distance |
For most daily drivers, fixed guidelines are enough. For larger SUVs, trucks, and drivers who park in tight urban spaces, dynamic guidelines are better if the vehicle supports them properly.
Common Backup Camera Guideline Problems and Fixes
Guidelines look crooked or off-center
This usually means the camera bracket is not level, the license plate mount shifted, or the head unit guideline setting is out of alignment.
Lines disappeared from the screen
Some head units let you turn the guidelines on and off. If they vanish suddenly, check camera settings first. If the whole image acts strange, check the reverse trigger wire, fuse, and display settings.
Image flickers, freezes, or says no signal
That points to a wiring or power problem more often than a guideline problem. I check the ground point, reverse power feed, RCA connection, and fuse before replacing the camera.
Low voltage, bad battery, or alternator issues
Yes, electrical problems can affect the rear camera. If the battery is weak, the car needed a jump start, or the alternator is undercharging, the display may not switch properly or the image may flicker. This can show up after cold weather starting problems or after the battery died overnight.
If the car will not start and the camera also acts up, solve the charging issue first. A battery at low voltage can make a camera look bad even when the camera itself is fine. For battery maintenance and jump starter basics, NOCO is a solid reference.
Blurry image or poor night visibility
Clean the lens first. Then inspect for moisture inside the camera housing. If the image is still poor, the sensor quality may simply be weak, especially on very cheap cameras.
| Problem | Likely Cause | Quick Fix |
|---|---|---|
| Guidelines crooked | Camera mounted unevenly | Re-level the camera bracket |
| Guidelines off-center | Bad alignment or software setting | Recalibrate or adjust center line |
| Lines disappeared | Guidelines turned off in menu or signal issue | Check display settings and reverse trigger |
| Flickering image | Weak ground, low voltage, loose wire | Test power and ground with a multimeter |
| No signal | Bad RCA cable, wireless interference, blown fuse | Inspect connectors and fuse |
| Blurry picture | Dirty lens or internal moisture | Clean lens or replace damaged camera |
Common Mistakes to Avoid
Trusting the lines too much
The lines are guides, not guarantees. Real distance can vary based on camera angle, bumper shape, and lens distortion.
Ignoring lens cleaning and camera angle
Road grime, wax, rain spots, and snow can ruin visibility fast. A camera mounted at the wrong angle can also make the guideline overlay misleading.
Using guidelines without checking mirrors
This is a common mistake in busy parking lots. The camera helps behind you, but the mirrors still matter for side traffic and rear corners.
Forgetting that wide-angle lenses change distance judgment
Many backup cameras use a wide lens. That gives better coverage, but it also makes objects look farther away than they are.
- Do not rely on the red line as an exact stop point
- Do not back up quickly just because the space looks clear on screen
- Do not ignore intermittent electrical issues after a dead battery or jump start
- Do not assume every aftermarket camera comes calibrated from the box
Pro Tips and Best Practices
Best camera mounting height for accurate guidelines
Mount the camera so you can see the edge of the bumper and the ground just behind it. Too high and the close area disappears. Too low and distance becomes harder to judge.
How to test camera power with a multimeter
If the image cuts out or the guidelines flicker, measure voltage at the camera power wire when reverse is selected. You want a solid 12V supply and a clean ground. In my experience, a multimeter gives faster answers than guessing or swapping parts.
Why stable battery voltage matters
A weak battery, poor charging system, or bad alternator can create low-voltage problems that show up in camera systems. That is why I always think about the whole vehicle electrical system, not just the camera itself.
When parking sensors make the system even better
A good rear camera with clear guidelines is excellent. Add parking sensors and the setup gets even better. The camera shows you the obstacle, and the sensors warn you when you get very close.
| Visibility Tool | What It Helps With | Best Use |
|---|---|---|
| Backup camera guidelines | Distance and alignment references | Parking, garage entry, driveway backing |
| Mirrors | Side traffic and vehicle edges | Daily driving and parking lots |
| Parking sensors | Close obstacle warnings | Tight spaces and low-speed reversing |
Best Tools and Backup Camera Options for Better Visibility
What to look for before you buy
I look for a few basics first: sharp image, good low-light performance, waterproof housing, and adjustable guidelines if possible. For older vehicles, I also pay close attention to wiring quality and monitor compatibility.
| Feature | What I Recommend | Why It Matters |
|---|---|---|
| Resolution | 720p minimum | Helps you read objects and lines more clearly |
| Viewing angle | 140 to 170 degrees | Good balance of coverage and distance judgment |
| Waterproof rating | IP67 or higher | Better durability in rain and car washes |
| Guidelines | On/off or adjustable if possible | Makes calibration easier |
| System type | Wired for best stability | Usually fewer dropouts and less lag |
If you want a good source for fit information and install planning, Crutchfield is useful for comparing camera types and vehicle integration options.
Product Pick: LeeKooLuu Wired Backup Camera Kit
Good value and stable signal for drivers who want dependable visibility and easy-to-read parking lines.
Product Pick: AUTO-VOX Wireless Backup Camera System
A smart option for older cars if you want simpler installation and a cleaner DIY setup.
Product Pick: AstroAI Digital Multimeter
Useful for checking reverse power, ground quality, and low-voltage problems before you replace camera parts.
FAQ
What do the red yellow and green lines mean on a backup camera?
They are distance guides. Green is usually the far zone, yellow is a caution zone, and red is the closest warning zone near the rear bumper.
Are backup camera guidelines accurate?
They are approximate, not exact. Accuracy depends on camera angle, vehicle shape, and how well the system is calibrated.
Can I adjust backup camera guidelines myself?
Yes, on many aftermarket systems you can adjust the lines in the monitor menu or by repositioning the camera. OEM dynamic systems may need professional calibration.
Why are my backup camera guidelines crooked?
The camera is often mounted unevenly, or the display setting is misaligned. Start by checking the physical camera position first.
Can a weak battery affect a backup camera?
Yes. Low battery voltage or poor charging can cause flicker, delayed startup, or a blank screen when the vehicle is put in reverse.
Is fixed or dynamic backup camera guidance better?
Dynamic guidance is better for turning into tight spaces because it moves with steering input. Fixed guidelines are simpler and work well for most drivers.
Should I rely only on backup camera guidelines when parking?
No. Use them with mirrors, a shoulder check, and slow vehicle movement. They are visual aids, not a full replacement for driver awareness.
Conclusion
Backup camera guidelines can make reversing easier, safer, and more precise when they are set up correctly. They help most with alignment, bumper clearance, and spotting low obstacles in tight spaces.
The key is simple: use the lines as guides, keep the camera clean, verify the mounting angle, and do not ignore power or voltage problems. If you choose the right camera and use it with mirrors and good habits, you will get much better visibility where it matters most.

