To interpret a backup camera screen, treat it as a wide-angle rear view, use the red, yellow, and green lines as caution zones, and remember that objects usually look farther away than they really are. Always confirm with mirrors and a shoulder check because guide lines vary by vehicle.
Backup camera screens confuse a lot of drivers. The image can look curved. The lines can feel inconsistent. Some systems add icons, beeps, or moving path lines. I’m Ethan Caldwell, and I’ve spent years working on vehicle electrical systems, OEM camera circuits, and aftermarket installs. I’ll show you how to read the screen correctly and how to tell the difference between normal behavior and a real problem.
What a Backup Camera Screen Display Shows and Why It Matters
A backup camera display is more than a live video feed. It is a driving aid that helps you judge distance, angle, and rear obstacles while reversing. Most U.S. vehicles also combine the camera image with parking sensor alerts, warning bars, or moving guide lines.
What you see on the screen usually includes the rear camera image, colored distance zones, and sometimes obstacle icons. Those lines are there to help you estimate how close you are to a wall, another car, a curb, or the garage door. They are not all calibrated the same way, so you should think of them as reference marks rather than exact measurements.
This matters because backup cameras improve rear visibility, especially in tight parking spots, crowded parking lots, and home garages. They are a helpful safety tool, but they do not replace mirrors or a shoulder check. If you want the broader safety background, the NHTSA rear visibility guidance is worth reading.
How a Backup Camera Display Works in Your Car
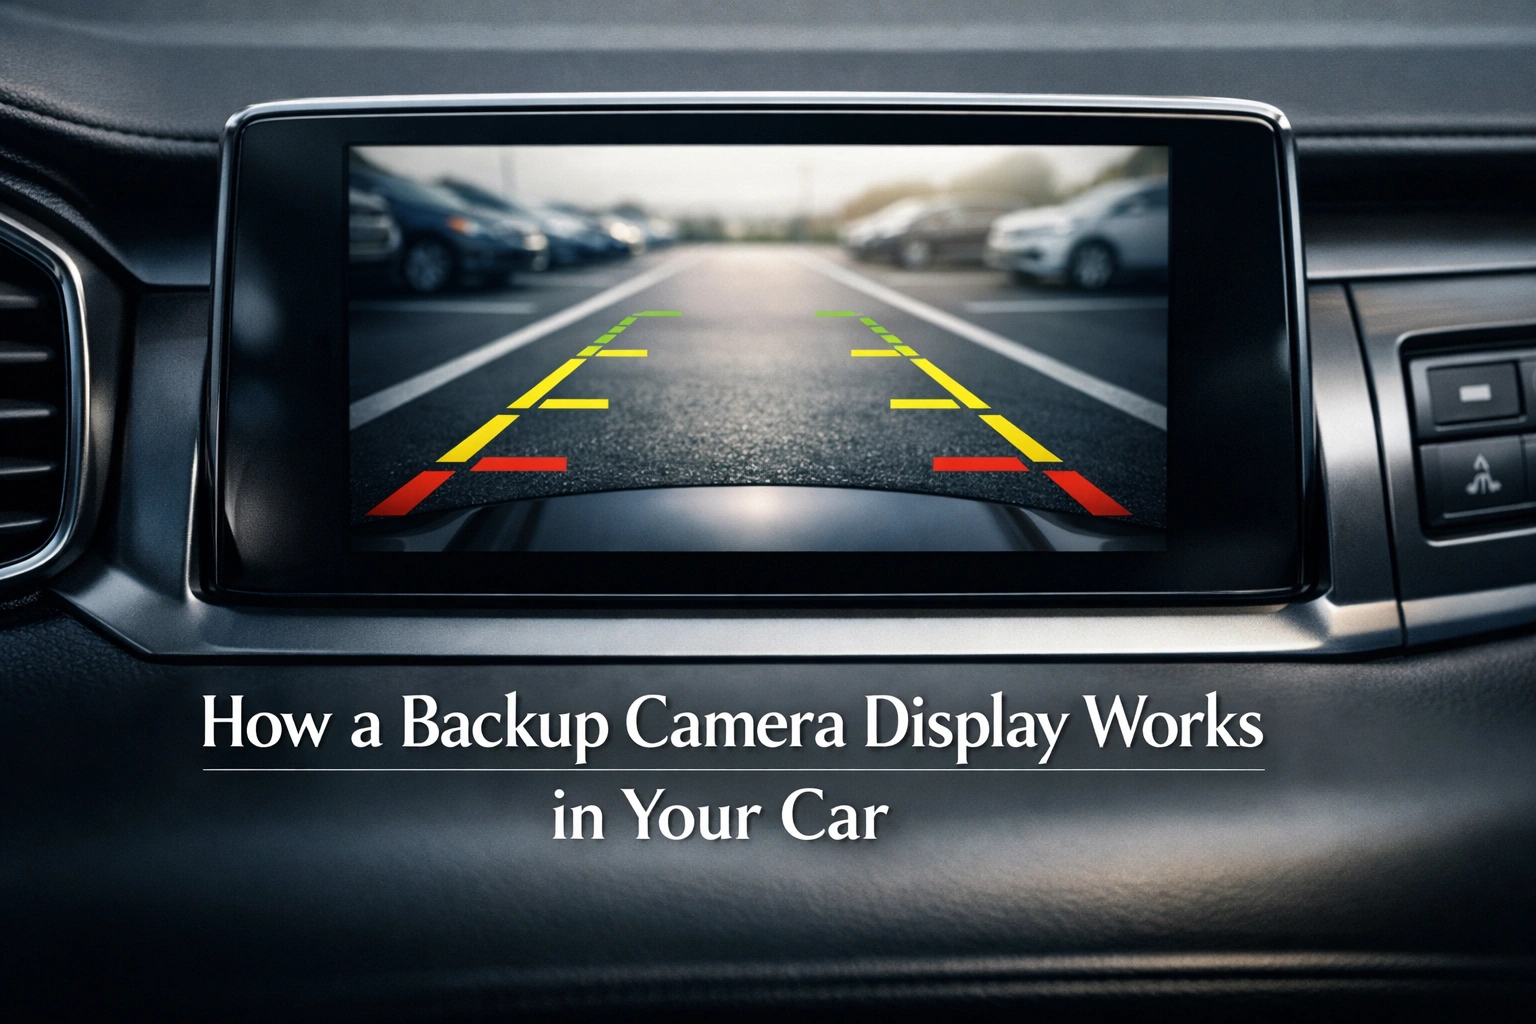
Camera lens, image processing, and screen layout
When you shift into reverse, the vehicle tells the camera system to wake up. On some cars, the reverse light circuit powers the camera directly. On others, a body control module or infotainment module handles the trigger. The camera then sends a video signal to the dash screen or rearview mirror display.
The camera lens is usually wide-angle. That is why the image looks stretched near the edges. It helps you see more of the area behind the car, but it also makes distance harder to judge at first. Some systems generate the guide lines inside the camera. Others add them inside the screen or head unit.
Most backup cameras do not need much current, so amps and wattage are not usually the issue. Stable voltage and a clean ground are far more important. A low-voltage feed, weak connection, or corroded ground can cause flicker, delay, or a blank screen.
Static lines, dynamic guidelines, and distance zones
Static lines stay fixed on the screen. They show a general path behind the vehicle. Dynamic guide lines move when you turn the steering wheel. Those moving lines try to predict where the car will travel if you keep the wheel at that angle.
Most systems use color zones like green, yellow, and red. Green usually means a safer buffer. Yellow means caution. Red means stop or proceed very slowly. The exact spacing depends on the vehicle, screen size, and camera calibration.
| Guide line color | Typical meaning | Approximate distance in many vehicles | How I use it |
|---|---|---|---|
| Green | Safer buffer zone | About 6 to 10 feet | Good for lining up your approach |
| Yellow | Caution zone | About 3 to 6 feet | Slow down and check mirrors closely |
| Red | Danger or stop zone | About 0 to 3 feet | Stop and confirm clearance before moving farther |
Those distances are only rough references. I always tell drivers to test their own camera with cones or boxes in an empty parking lot so they know what the colored zones really mean on that specific vehicle.
How voltage, wiring, and the alternator affect the display
This is the part many drivers miss. Backup camera problems are often electrical before they are optical. If the battery is weak, the charging system is unstable, or a fuse has poor contact, the screen may go black, flicker, reset, or show a delayed image when reverse is selected.
If your car barely starts in cold weather, or the battery dies overnight, diagnose that first. A weak lead-acid, AGM, or lithium starter battery can cause electronic modules to behave unpredictably. For battery basics, I often point people to Battery University charging basics. If you need a charger or maintainer to stabilize the vehicle before testing, the NOCO official site is a solid place to compare options.
With the engine off, a healthy fully charged 12-volt battery is usually around 12.6 volts. Around 12.2 volts is getting weak. With the engine running, most vehicles should charge somewhere around 13.7 to 14.7 volts. If charging voltage is low or erratic, the alternator or voltage regulator may be part of the problem.
| Electrical reading | What it usually means | Possible camera symptom |
|---|---|---|
| 12.6V engine off | Healthy battery | Camera should power normally |
| 12.2V engine off | Partly discharged battery | Slow boot, weak image, intermittent issues |
| Below 12.0V engine off | Weak battery | Black screen, rebooting, no image after startup |
| 13.7V to 14.7V engine running | Normal charging range | Stable operation |
| Below 13.3V engine running | Possible charging problem | Flickering or unstable electronics |
| Above 15.0V engine running | Possible overcharging | Display glitches or module stress |
How to Interpret Backup Camera Screen Displays Step by Step
Start with image orientation and mirror view
The first thing I check is whether the image is intentionally mirrored. Many backup cameras display a mirror-style image so it behaves more like a rearview mirror. That means what looks left on the screen may actually be the left side behind the car in a familiar mirror format.
If the image feels completely wrong, especially on an aftermarket system, it may be set to the wrong mode. Some cameras can switch between mirrored and non-mirrored view. A wrong setting makes parking harder and can create left-right confusion.
- Shift into reverse.
- Look at a fixed object behind the left side of the vehicle.
- Confirm that it appears where you expect on the screen.
- If it seems backwards in an unusual way, check the camera settings or installation instructions.
Read the red, yellow, and green guide lines
Once orientation makes sense, use the colored zones as your main reference. Green is the early warning area. Yellow means slow down and get precise. Red means you are very close and should stop unless you already confirmed there is still safe room.
I tell beginners not to focus on the center of the picture alone. Watch where the bottom edge of the image, the line colors, and the bumper area seem to meet. That gives a more realistic sense of closing distance.
- Use green to line up the car.
- Use yellow to reduce speed and correct angle.
- Use red as the final caution zone, not as a guarantee of exact bumper clearance.
Account for wide-angle distortion and blind spots
Wide-angle lenses are useful, but they can fool you. Objects often look farther away than they really are. A curb, post, or child’s bike can seem safely back when it is actually close. The outer edges of the image can also appear stretched.
This is why I never rely on the camera alone in a tight garage or crowded lot. The camera helps with what is directly behind you, but mirrors still help you judge the corners and side clearance. Fast-moving traffic, low objects, and items near the bumper corners can still surprise you.
Use dynamic path lines when turning
If your system has moving guide lines, they are there to show the projected path of the car based on steering input. They are helpful for backing into a parking spot or curving into a driveway.
Use them as a guide, not a promise. Dynamic lines do not always account for tire slip, trailer swing, uneven pavement, or camera calibration errors. If the lines look off after an alignment, steering repair, or battery disconnect, the system may need recalibration.
Check visibility in rain, glare, and low light
A backup camera can look very different at night, in heavy rain, or with sun glare. Water spots, dirt, road salt, or wax haze can make the screen look foggy even when the camera itself is fine. In cold weather, condensation inside the camera housing is also common.
Before assuming the camera is failing, clean the lens and test it again in normal daylight. If the image is still weak only at night, the camera sensor may be aging or the display brightness may be too low.
Backup Camera Display Symbols, Alerts, and Screen Types Explained
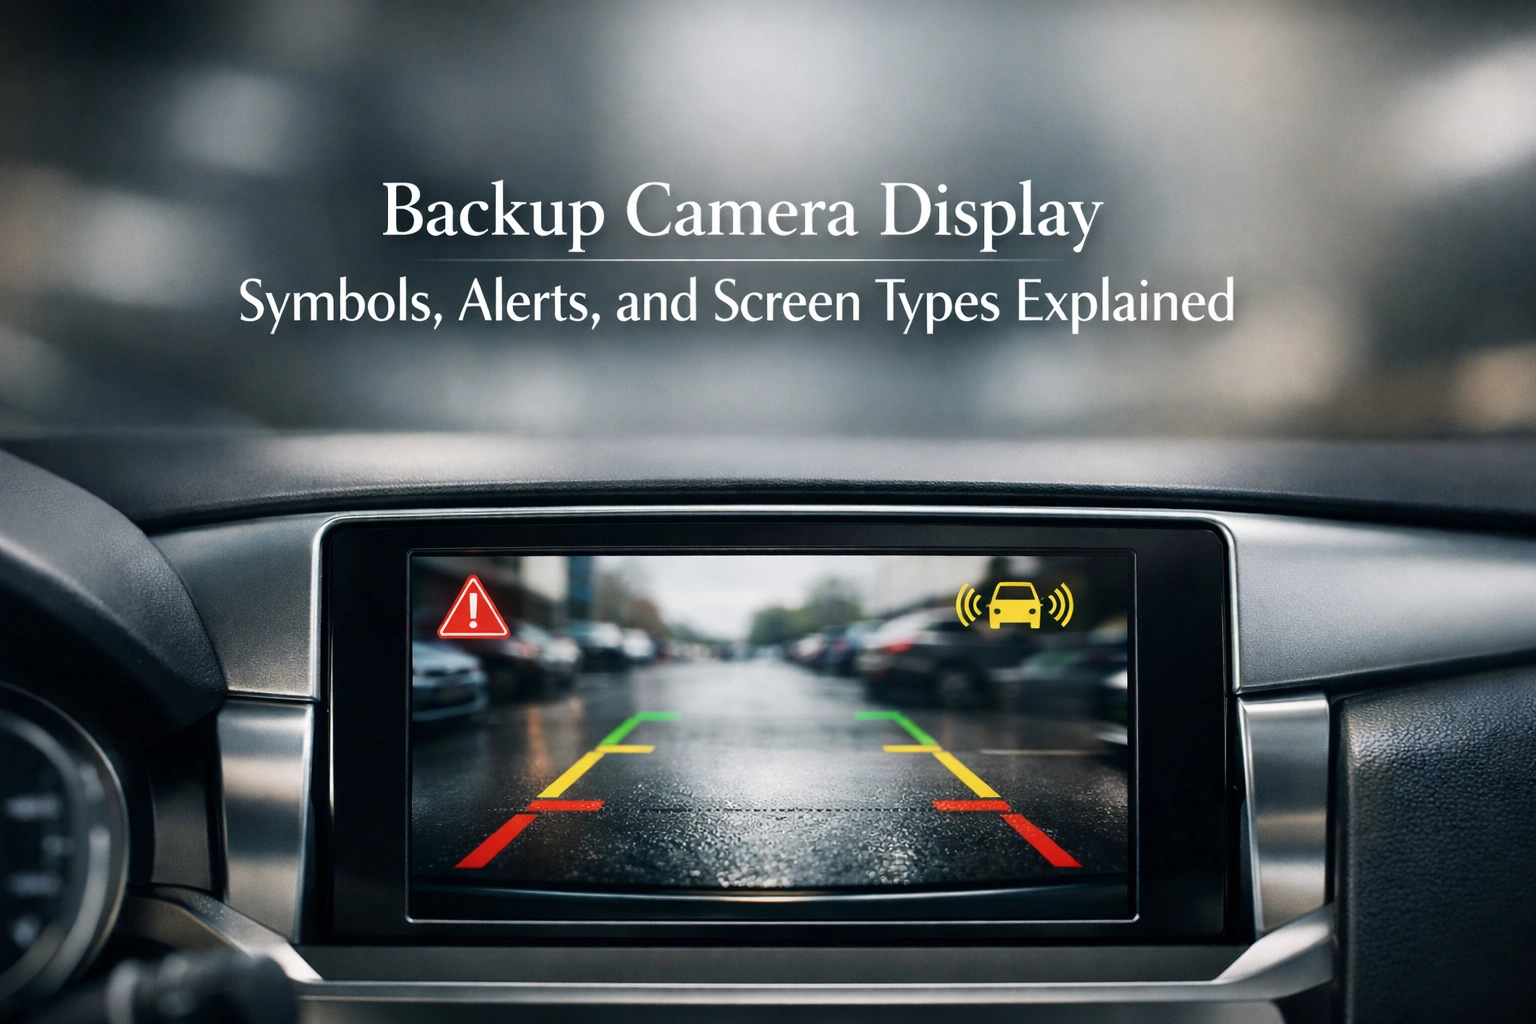
Parking sensor icons and warning overlays
Many vehicles add sensor bars, colored obstacle blocks, or beep indicators on top of the camera image. Those overlays usually come from the parking sensor system, not from the camera itself. If the picture is clear but the warning bars are wrong, the issue may be with an ultrasonic sensor rather than the camera.
Some systems also show cross-traffic alerts, trailer hitch lines, or a top-down vehicle graphic. Read these as secondary aids. They help, but the live image is still the main reference when reversing.
Rear camera vs 360 camera vs mirror display
A standard rear camera shows only what is behind the vehicle. A 360 system stitches images from several cameras to create a bird’s-eye style view. A mirror display replaces the traditional rearview mirror with a live screen. Each one takes a little getting used to.
Rear camera views are simplest and usually easiest for beginners. A 360 system gives better context around the whole vehicle but can distort edges more. Mirror displays save dash space, though some drivers need time to adjust to screen depth and brightness.
OEM vs aftermarket backup camera screens
Factory OEM systems usually look cleaner, integrate better with steering-angle data, and match the vehicle screen. Aftermarket kits are often cheaper and easier to replace, but image quality, guide line accuracy, and low-light performance vary a lot.
OEM systems may also use camera voltages that are not a simple 12 volts. Some factory cameras run on regulated lower voltage, so do not assume you can power-test them like a basic aftermarket camera. That is one of the biggest mistakes I see in DIY diagnosis.
Common Backup Camera Screen Problems and Fixes
Black screen or no image
A black screen usually points to lost power, bad ground, a failed camera, a bad reverse trigger, a blown fuse, or a screen/module issue. On aftermarket kits, I first check whether the camera gets power only in reverse and whether the ground is solid. On factory systems, I also consider a module fault or software issue.
Flickering, rolling, or delayed image
Flickering often comes from unstable voltage, loose wiring, a weak ground, or a damaged video cable. A delayed image can happen when the head unit is slow to boot, the reverse signal is weak, or the system is struggling with low battery voltage after startup. Rolling or static-like interference usually means signal noise or poor shielding in the video line.
Blurry, foggy, or poor night vision
Start with the simple stuff. Clean the lens. Check for moisture under the lens cover. Inspect for cracks in the housing. If the image still looks soft all the time, the camera sensor may be failing. If it only happens at night, the issue may be low-light sensitivity rather than total camera failure.
Missing guide lines or wrong image orientation
Missing guide lines can be a settings issue, a camera type mismatch, or a failed head unit overlay. Wrong orientation usually happens after an aftermarket install or replacement camera swap. Some camera harnesses have loop wires or menu settings that control mirror mode and line display.
Low battery voltage, blown fuse, or charging-system faults
If the vehicle had a dead battery overnight, slow cranking, or cold-weather starting trouble, handle that before chasing camera parts. Backup camera systems depend on stable system voltage. If the alternator is weak or the battery is undercharged, the display may behave erratically even though the camera is not bad.
| Symptom | Likely cause | What I check first | Typical fix |
|---|---|---|---|
| Black screen | No power, bad ground, blown fuse, failed camera | Reverse power, fuse, ground point | Repair wiring, replace fuse, test or replace camera |
| Flickering image | Low voltage, loose connection, bad alternator output | Battery voltage, charging voltage, harness fit | Charge battery, repair connection, diagnose charging system |
| Blurry or foggy image | Dirty lens, moisture, weak camera sensor | Lens condition and housing seal | Clean lens or replace camera |
| Upside-down or reversed view | Wrong camera setting or incorrect replacement unit | Mirror mode and line settings | Reconfigure or install correct camera |
| No guide lines | Settings off, overlay failure, incompatible screen | Menu settings and camera type | Enable lines or match the correct system |
| Works only sometimes | Intermittent wiring, weak battery, water intrusion | Harness movement, voltage drop, connector corrosion | Repair wiring and seal connectors |
Common Mistakes to Avoid
- Trusting the red line as an exact bumper-to-object measurement.
- Ignoring mirrors and a shoulder check because the camera image looks clear.
- Backing too quickly for the camera and guide lines to stay useful.
- Forgetting that wide-angle lenses make objects seem farther away.
- Diagnosing the camera before checking battery voltage and fuses.
- Assuming every OEM and aftermarket camera uses the same voltage or wiring.
- Replacing the camera without checking the reverse trigger wire or ground.
- Testing only at night or only in rain and assuming the system is always bad.
Pro Tips and Best Practices
- Practice with cones, boxes, or parking blocks in an empty lot so you learn your own guide lines.
- Clean the lens regularly if you drive in snow, rain, or dusty conditions.
- If the car cranks slowly, charge the battery before diagnosing camera electronics.
- Check charging voltage with the engine running if the screen flickers after startup.
- After steering, alignment, or head-unit work, verify that dynamic lines still track correctly.
- On aftermarket cameras, inspect the reverse trigger wire and RCA-style video connections first.
- On factory systems, scan body and infotainment modules, not just engine codes.
- Do not feed 12 volts into an OEM camera unless you know its required voltage.
Best Tools for Diagnosing Backup Camera Display Problems
I use a small group of tools over and over when I troubleshoot backup camera screen issues. The right tool saves time and keeps you from replacing good parts.
| Tool | Best use | Why it helps |
|---|---|---|
| Microfiber cloth and safe lens cleaner | Blurry or hazy image | Rules out dirt before deeper diagnosis |
| Digital multimeter | Power, ground, fuse, and charging checks | Confirms voltage and continuity |
| OBD2 scanner with body module access | Factory camera and infotainment faults | Finds module-related trouble codes |
| Trim removal tools | Accessing harnesses and camera mounts | Prevents interior damage during inspection |
| Battery charger or maintainer | Low-voltage symptoms | Stabilizes the system before testing |
AstroAI Digital Multimeter
Fast, simple way to check camera power, grounds, fuse continuity, and charging voltage.
BlueDriver Bluetooth Pro OBD2 Scanner
Helpful for reading more than just basic engine codes on many modern vehicles.
NOCO Genius Smart Battery Charger
Useful when a weak battery or cold-weather voltage drop is causing intermittent camera behavior.
Comparison: Backup Camera Display Options and Diagnostic Tools
Static vs dynamic guidelines
| Type | How it works | Best for | Main downside |
|---|---|---|---|
| Static guidelines | Fixed lines that do not move | Simple reversing and basic parking | Less precise in turns |
| Dynamic guidelines | Lines move with steering input | Backing into angled spots and driveways | Can be misleading if calibration is off |
Mirror display vs dash screen
| Display type | Advantages | Drawbacks | Best use case |
|---|---|---|---|
| Rearview mirror display | Eye-level view, saves dash space | Smaller image, takes time to adapt | Compact cars and simple aftermarket kits |
| Dash or infotainment screen | Larger picture, easier to see details | May require looking farther from mirror line | Daily driving, trucks, SUVs, garages |
Multimeter vs OBD2 scanner for camera-related faults
| Tool | What it finds best | Where it falls short | My recommendation |
|---|---|---|---|
| Multimeter | Power, ground, fuse, voltage drop, alternator output | Cannot read module codes | Use first for basic electrical diagnosis |
| OBD2 scanner | Body, infotainment, and communication faults on supported vehicles | Cheap scanners may miss camera-related modules | Use after voltage and wiring checks |
FAQ
What do the red, yellow, and green lines mean on a backup camera?
The red line is the danger zone, yellow is caution, and green is the safer buffer. The exact distance varies by vehicle, so use the colors as guides, not exact measurements.
Why does my backup camera image look reversed?
Many backup cameras use a mirrored image on purpose so the view behaves more like a rearview mirror. If left and right feel completely wrong, an aftermarket camera may be set to the wrong image mode.
Can a weak battery or alternator cause backup camera display problems?
Yes. A weak battery, low cold-cranking performance, bad ground, blown fuse, or unstable alternator output can make the screen go black, flicker, or reboot when you shift into reverse.
Why is my backup camera blurry at night or in rain?
Water, dirt, lens haze, glare, and low light are the usual causes. Clean the lens first, then check for moisture inside the camera housing or a failing sensor.
How do I know if the problem is the camera, the screen, or the wiring?
Test power, ground, and reverse-trigger voltage at the camera first. If those are good, inspect the video connection and scan the infotainment or body module for codes.
Should I trust the backup camera alone when parking?
No. Use the camera as one tool, then confirm with your mirrors and a shoulder check. Wide-angle lenses distort distance, and the camera may miss low or fast-moving objects.
How do I reset a backup camera screen?
Start with a basic system restart, then check camera settings, fuses, and battery voltage. A reset may help after a battery change, but recurring problems usually point to wiring, module, or camera faults.
Conclusion
Interpreting a backup camera screen gets much easier once you understand three things: the image is wide-angle, the color lines are only guides, and stable vehicle voltage matters more than most drivers realize. Learn your own system, keep the lens clean, and do a quick electrical check before replacing parts. If you are troubleshooting a stubborn issue, the right tools make the job much faster.


